A Fault Tolerance Infrastructure ensures flawless functioning of the system, even if one or more components have failed to perform or not working up to the mark. Understand more about the fault tolerance infrastructure in our previous blog; where we have touched upon what is Fault Tolerance and High Availability, and defined the services being used to setting up a fault tolerance infrastructure.
Implementing Multi-Region Fault Tolerance Infrastructure
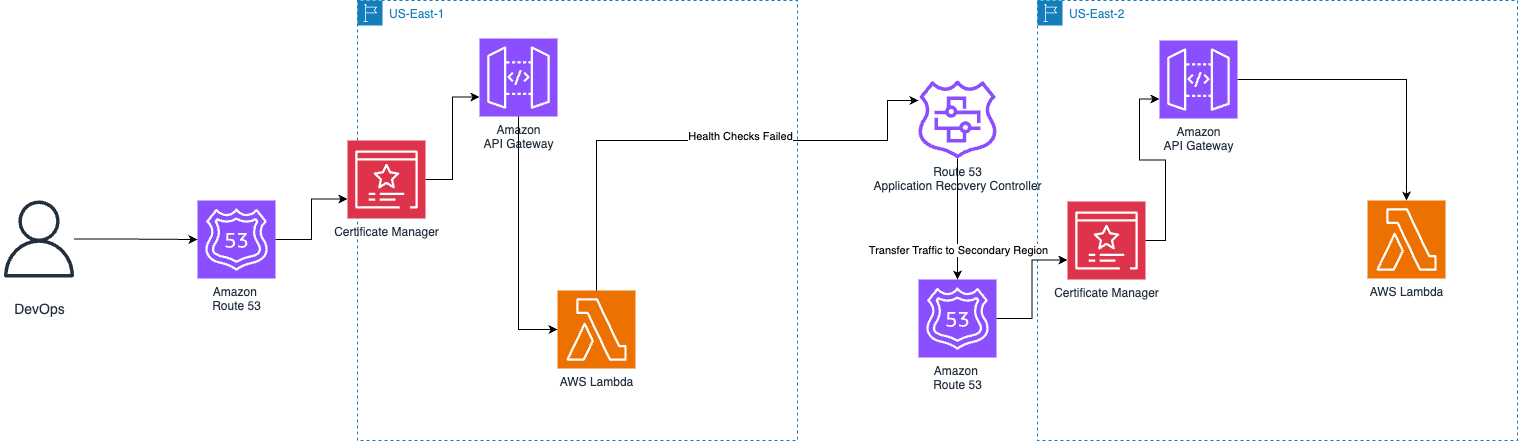
Now, let us dig deep into the step-by-step guide to setting up a fault tolerance infrastructure on the AWS console. The aim is that the traffic of a system should be diverted to another one, as described in the below image.
The event-driven serverless architecture performs a failover by updating the weights of the Route 53 record. This shifts the traffic flow from the primary to the secondary Region. This operation specifies the source Region from where the failover is happening to the destination Region.
Let’s dive into the implementation with one service at a time and see how fault tolerance is achieved with screenshots to support them.
Route 53:-
Route 53 is a DNS service enabling users to access websites and online resources by translating human-readable URLs into IP addresses for machine understanding.
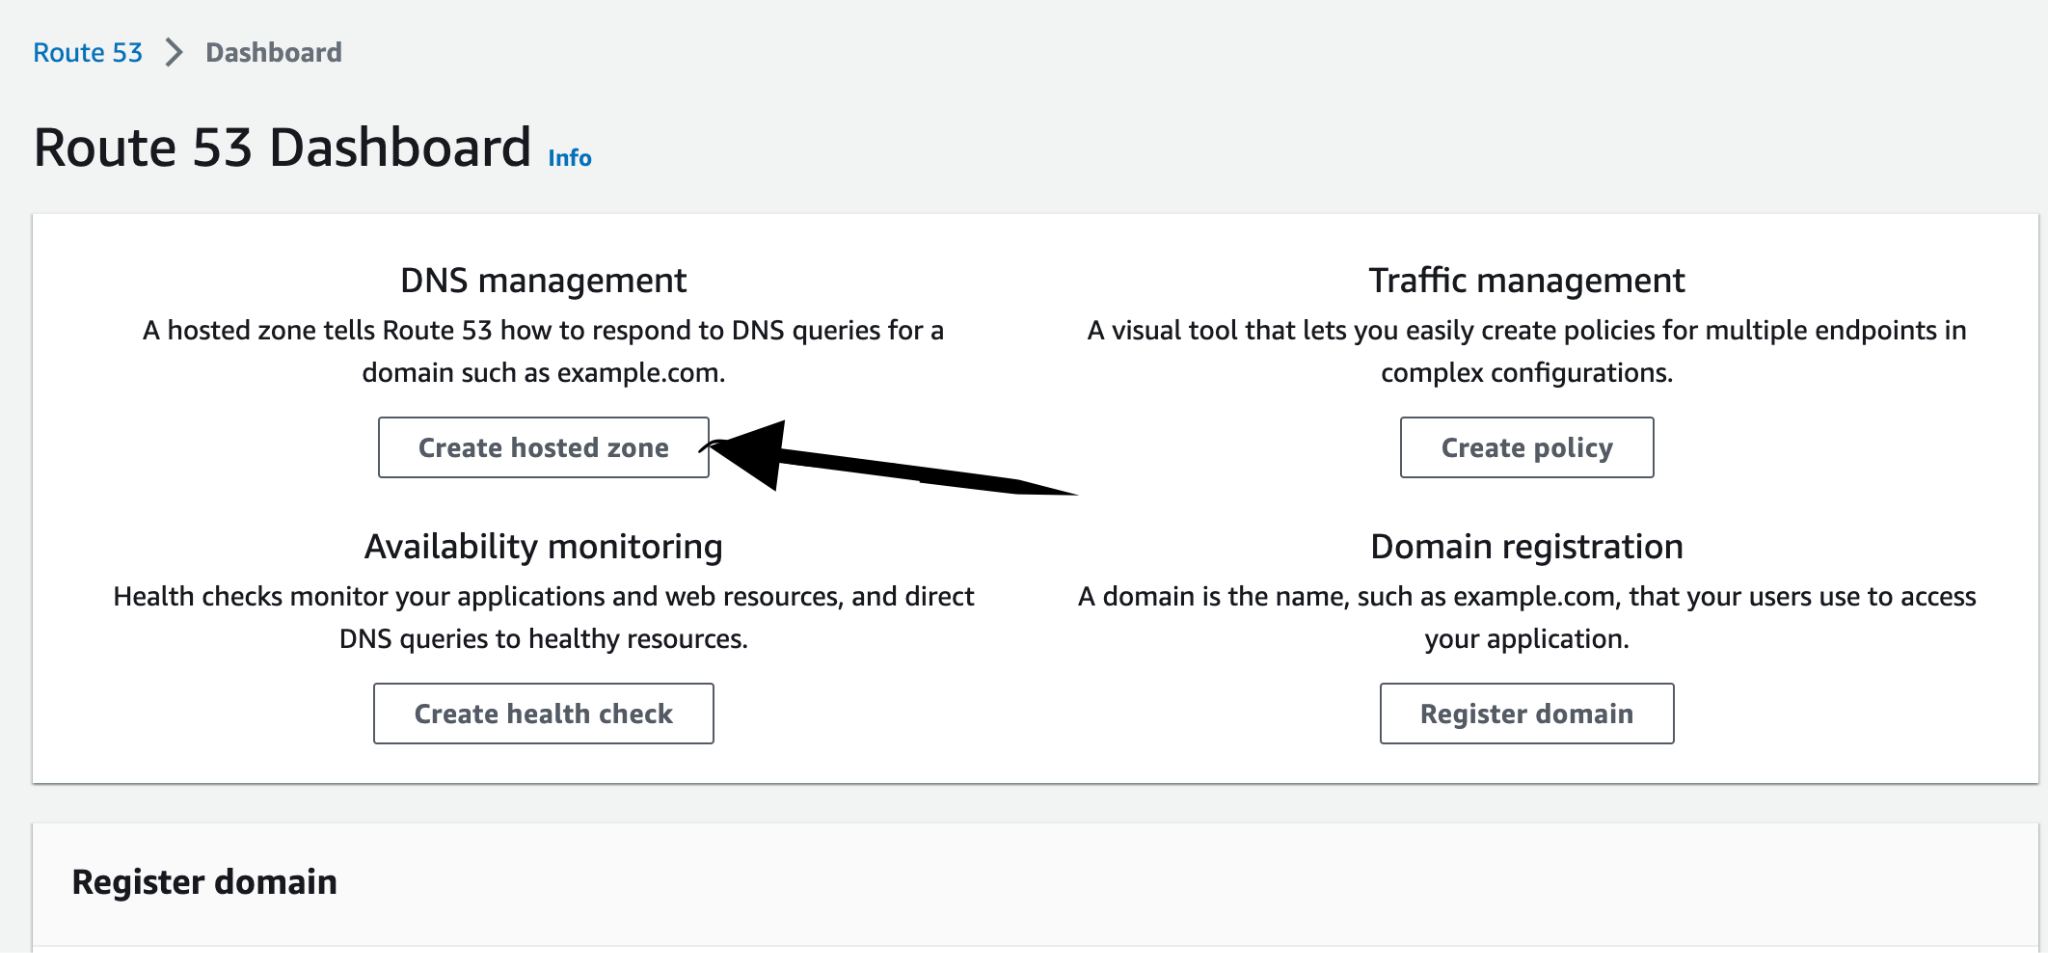
- Create a Hosted Zone with Route 53.
- Log in to your AWS console, navigate to the AWS Management Console dashboard, and search for 'Route 53'. Then, click on 'Create Hosted Zone'.
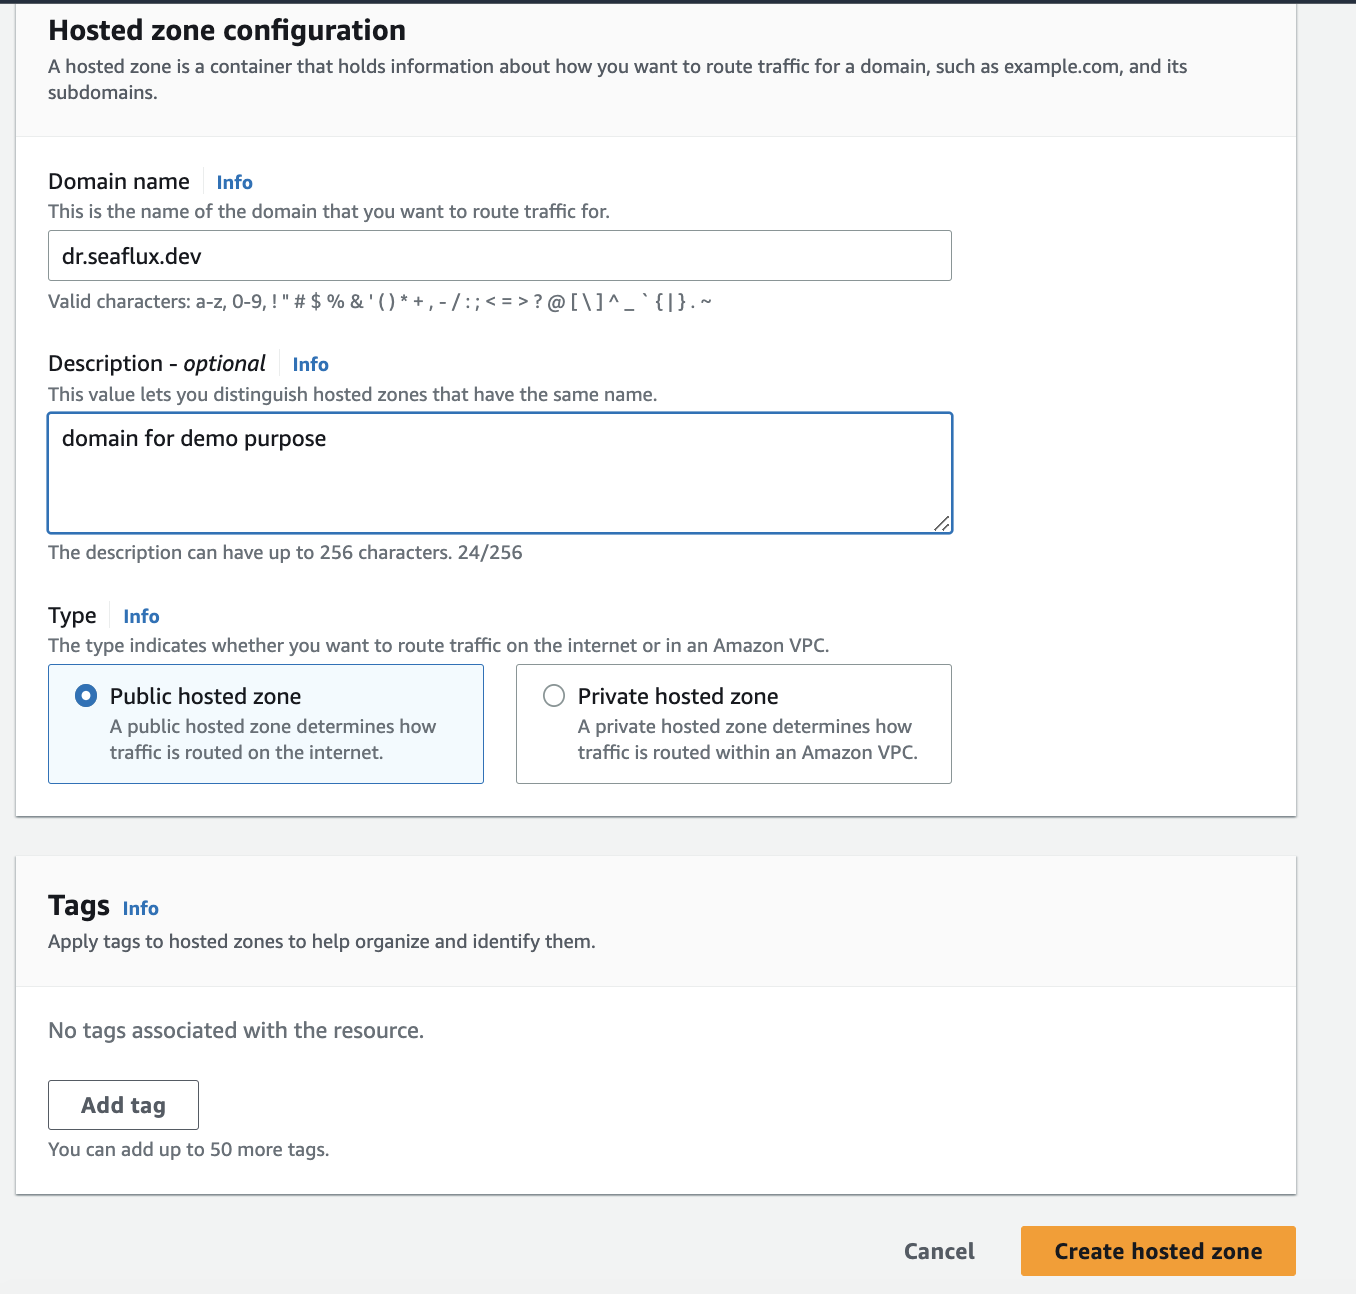
- Enter all the required details and click on 'Create Hosted Zone'.
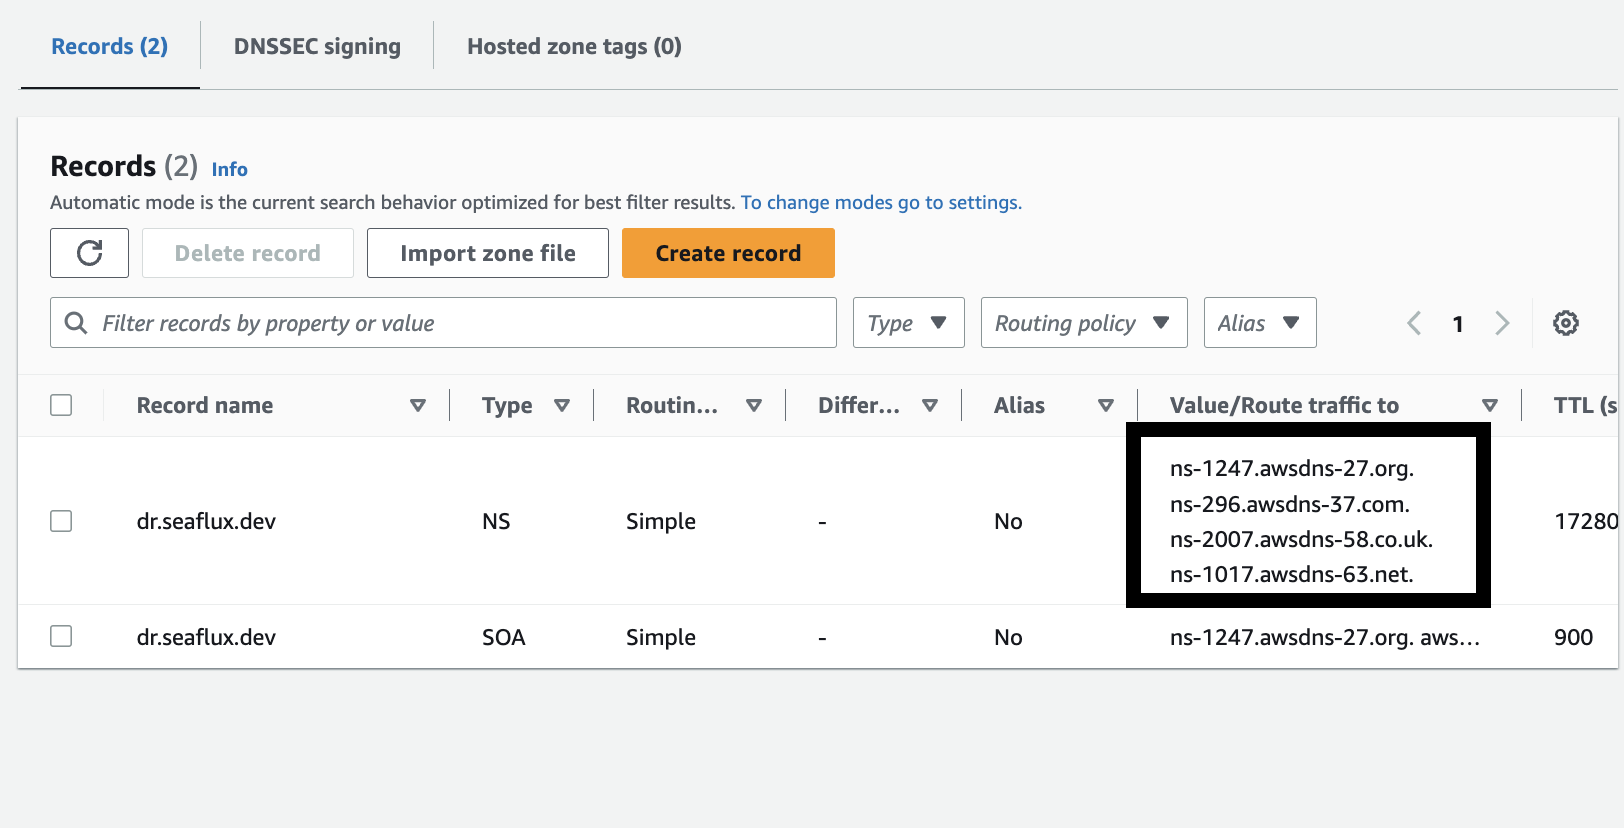
- After successfully creating the zone, you just need to add the Name Servers in your domain panel.
DNS has been created and now we need to generate an SSL certificate.
Amazon Certificate Manager
Amazon Certificate Manager (ACM) lets you easily provision, manage, and deploy public and private Secure Sockets Layer/Transport Layer Security (SSL/TLS) certificates for use with AWS services.
- Navigate to the AWS Management Console dashboard and search for "Certificate Manager".
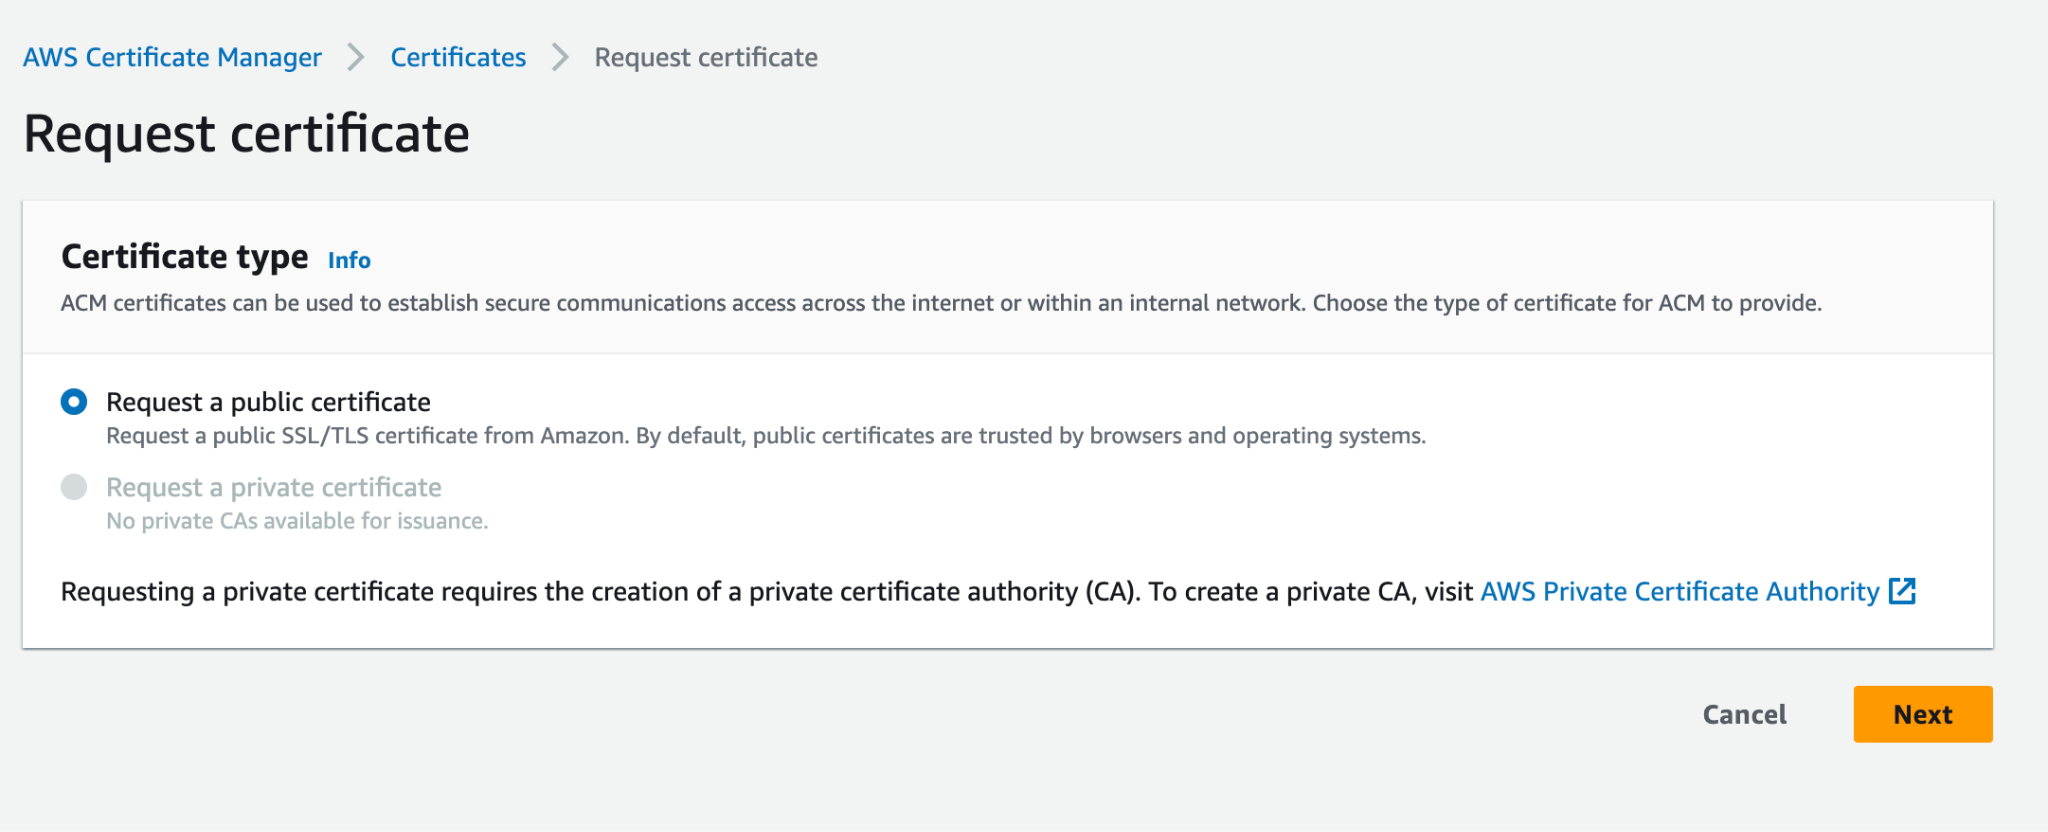
- Click on 'Request a Certificate', select 'Request a Public certificate', and click 'Next'.
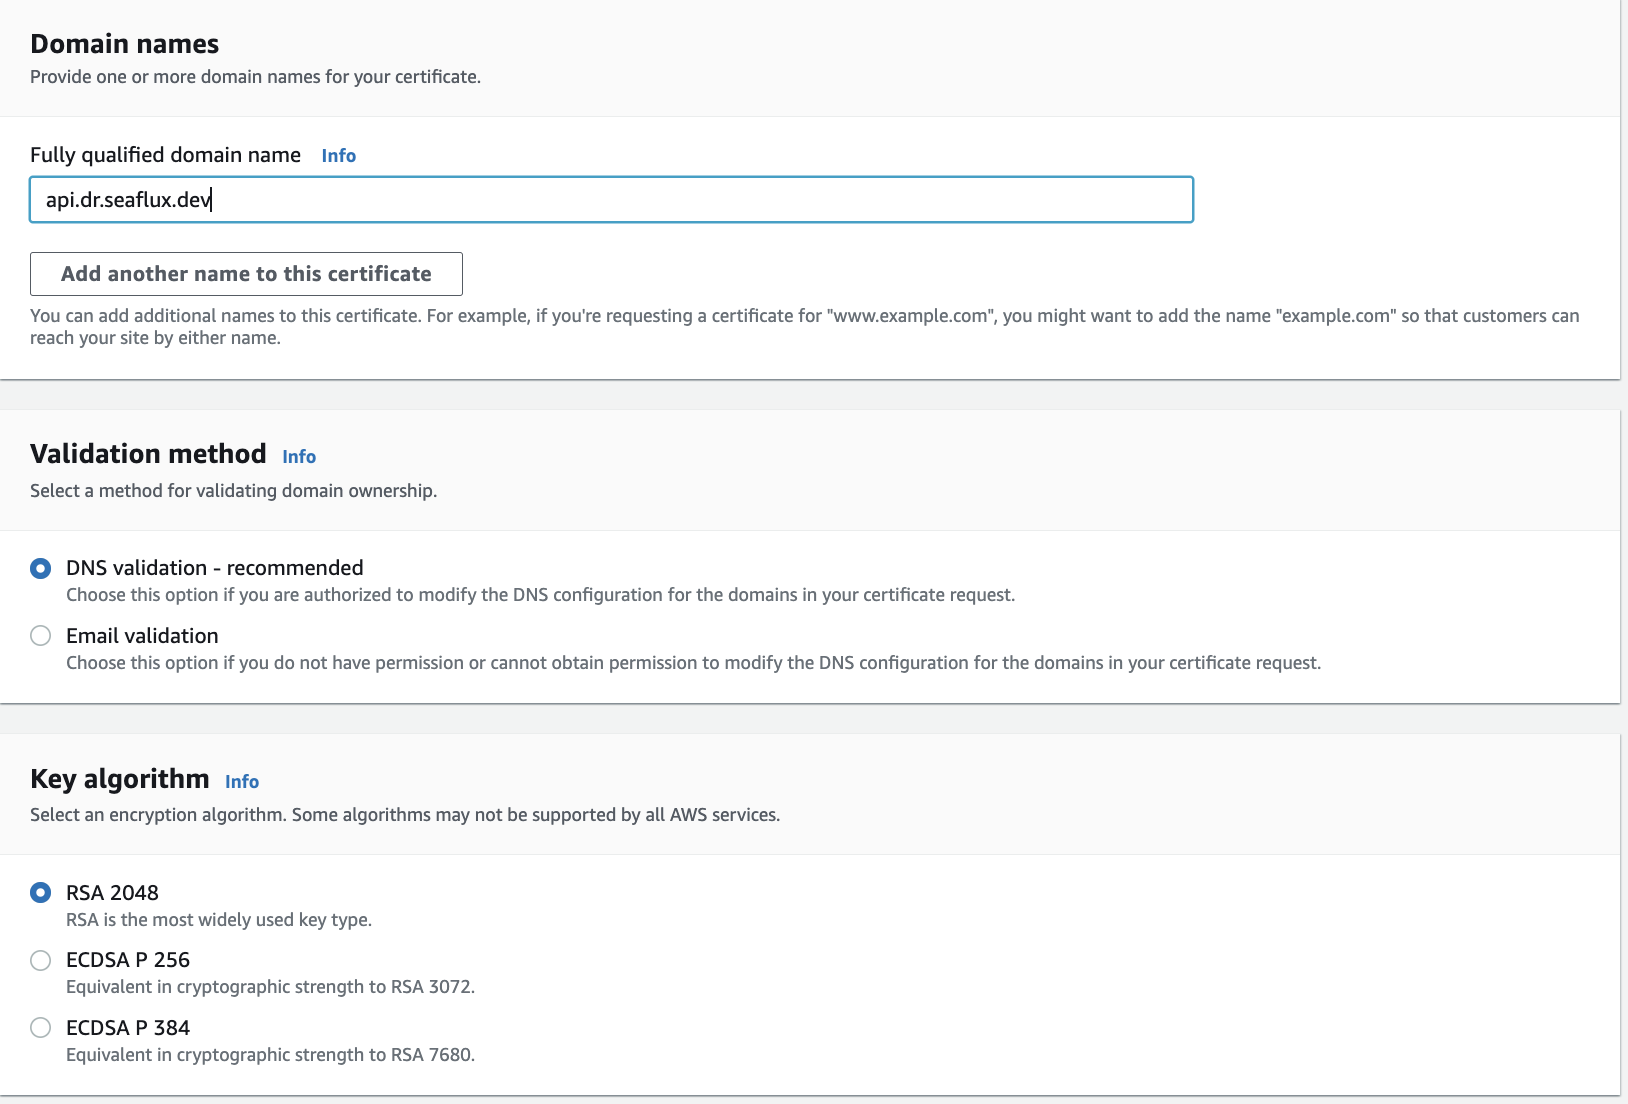
- Now, provide your domain name, select the 'Validate' method, and click on 'Request.
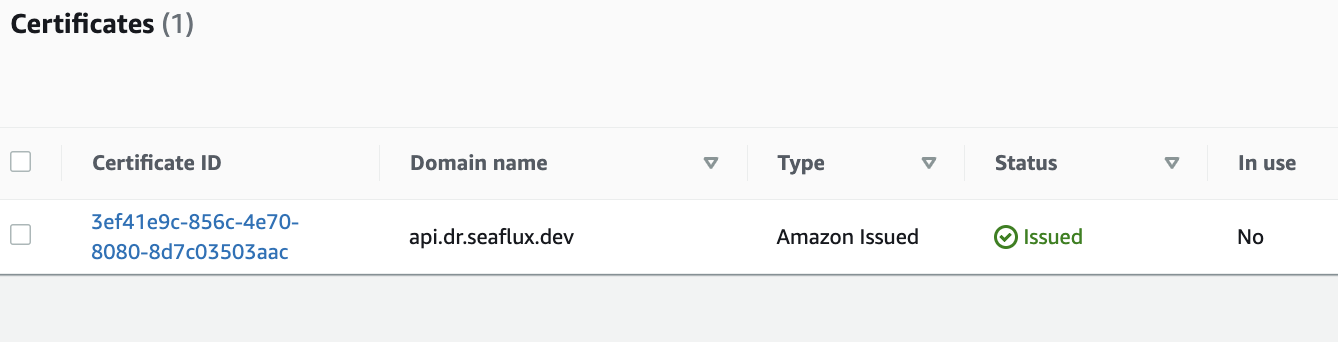
- Validate your certificate request by adding DNS records. Once validated, it will show the issued certificate.
AWS Lambda
Lambda runs your code to perform all of the administration of the compute resources, including server and operating system maintenance, capacity provisioning & automatic scaling, and logging. Provide your code in one of the supported language runtimes.
- In the primary region, go to the AWS Management Console dashboard, search for 'Lambda,'
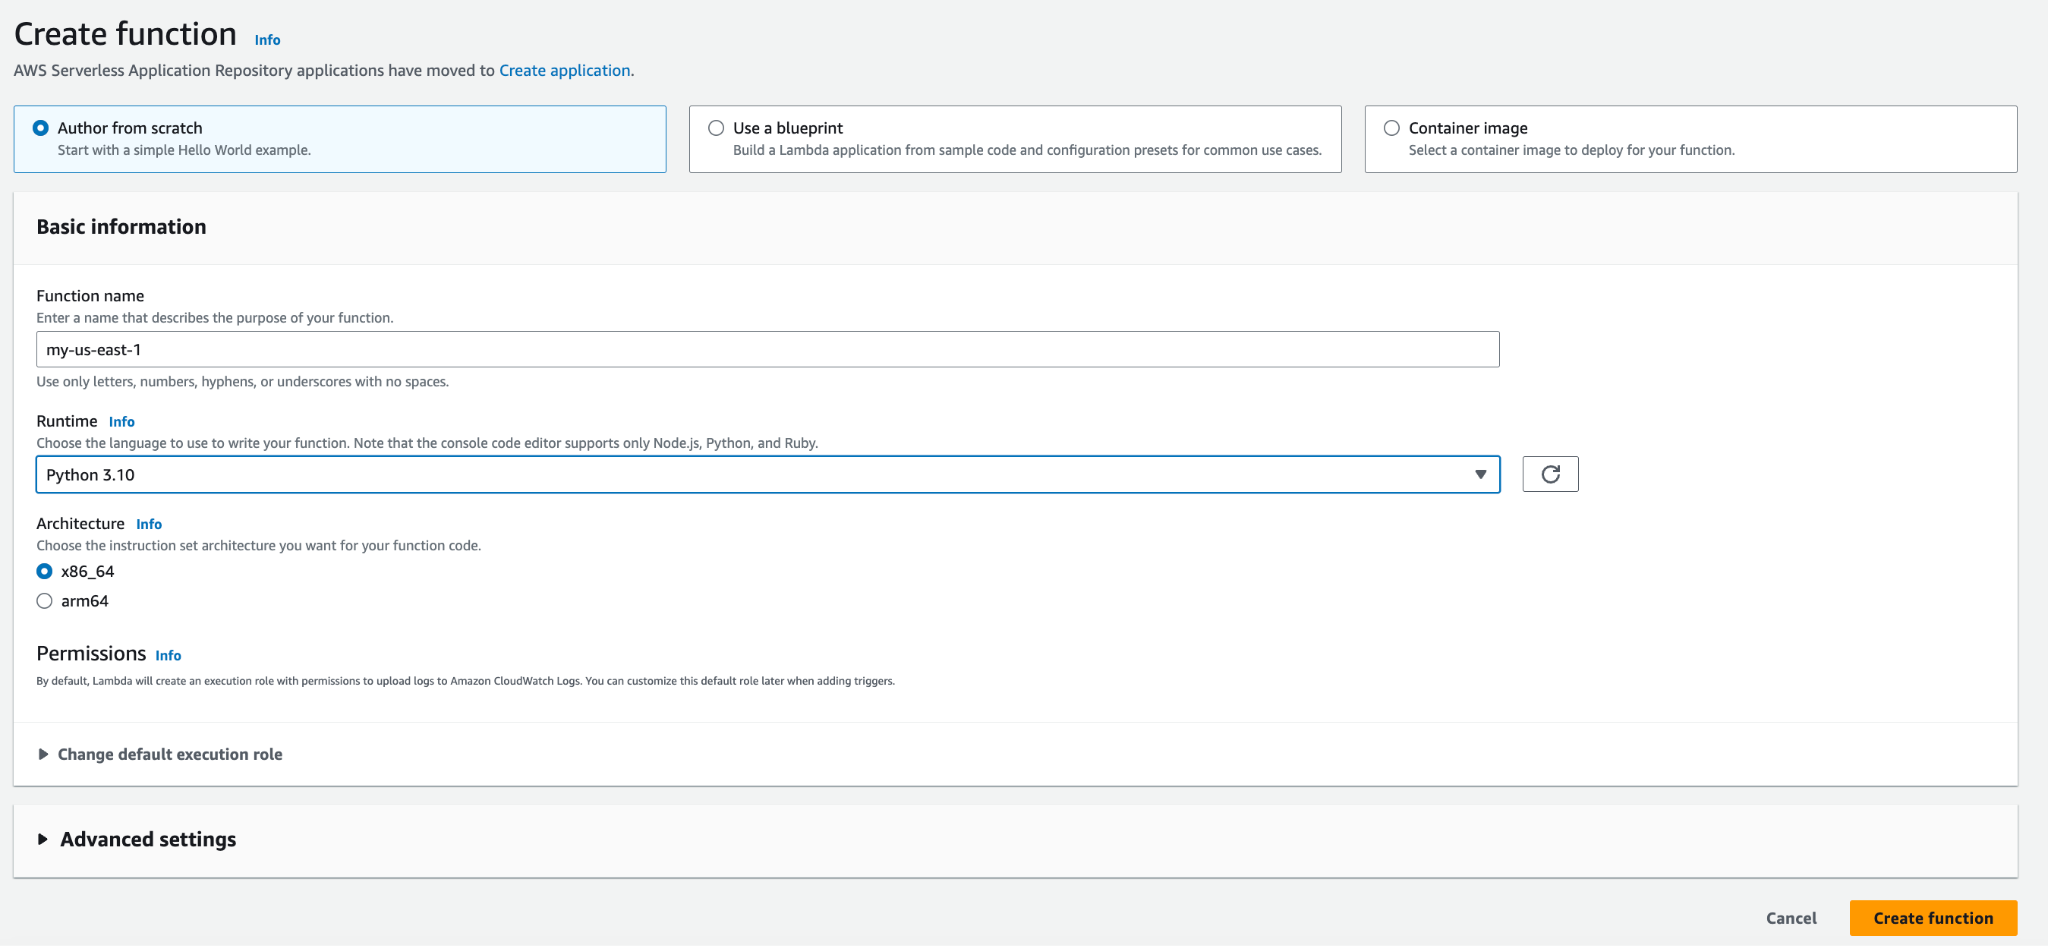
- Click on 'Create Function' and fill in all the details to create the function.
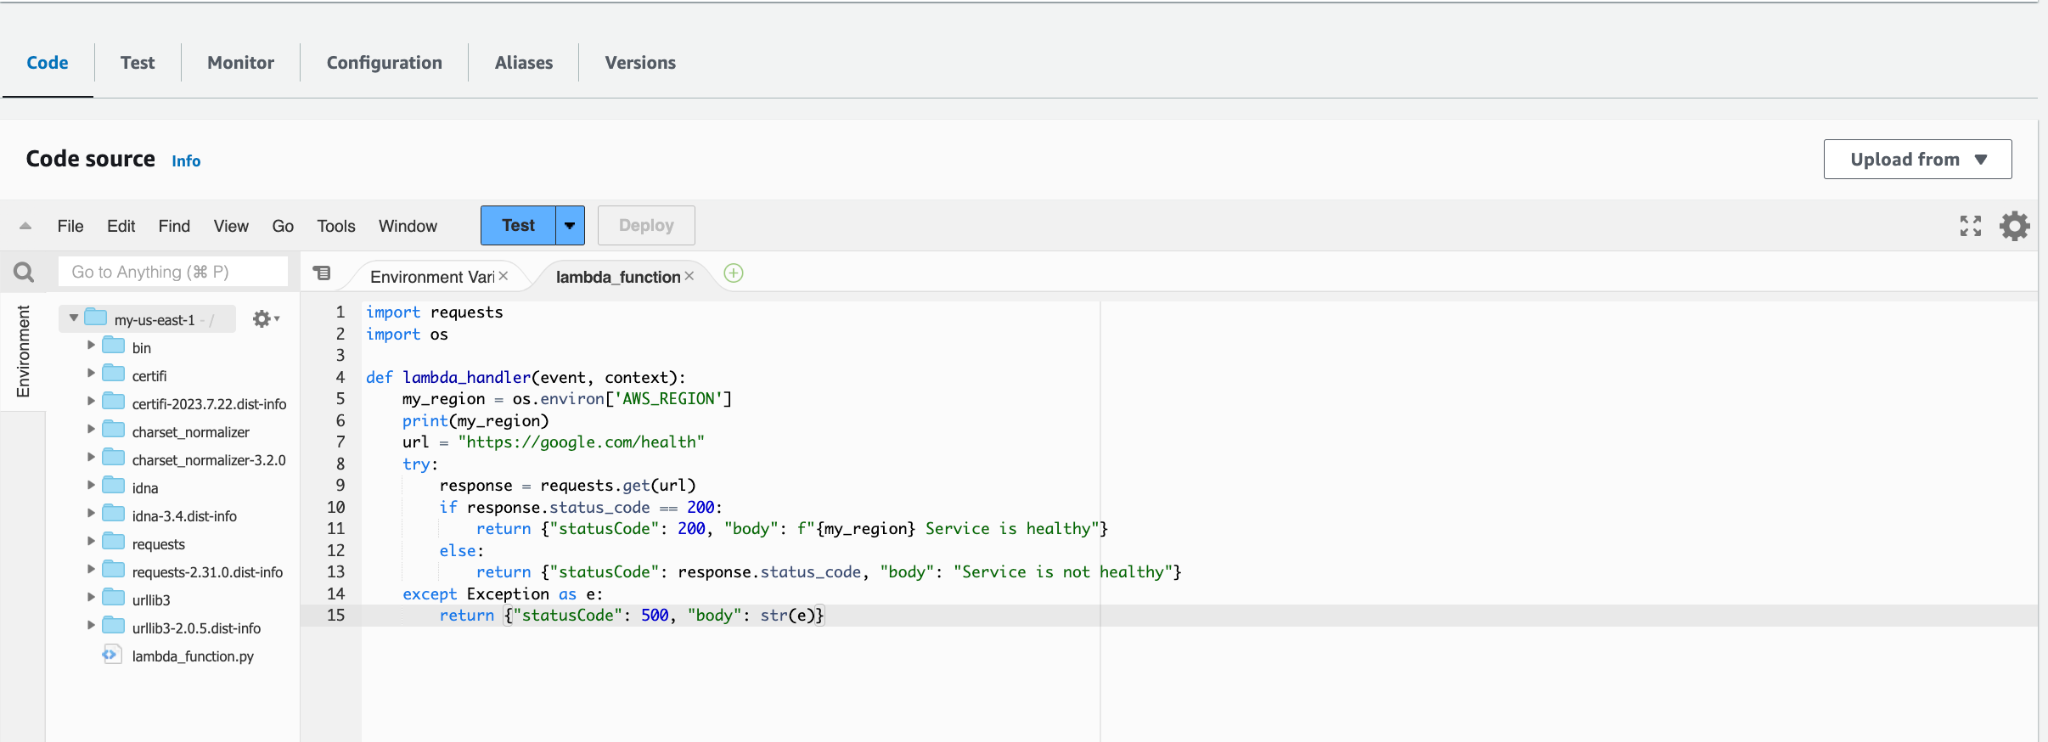
- Write your health check code for Lambda, then click on 'Deploy' and test.
- Follow the same process in the Secondary region, such as US-EAST-2.
API Gateway
Create APIs to access AWS or other web services, as well as data stored in the AWS Cloud, that can be used in your own or client applications, or even let it be available to third-party app developers.
- In the AWS Management Console dashboard, search for 'API Gateway,' and click on 'Create API’.
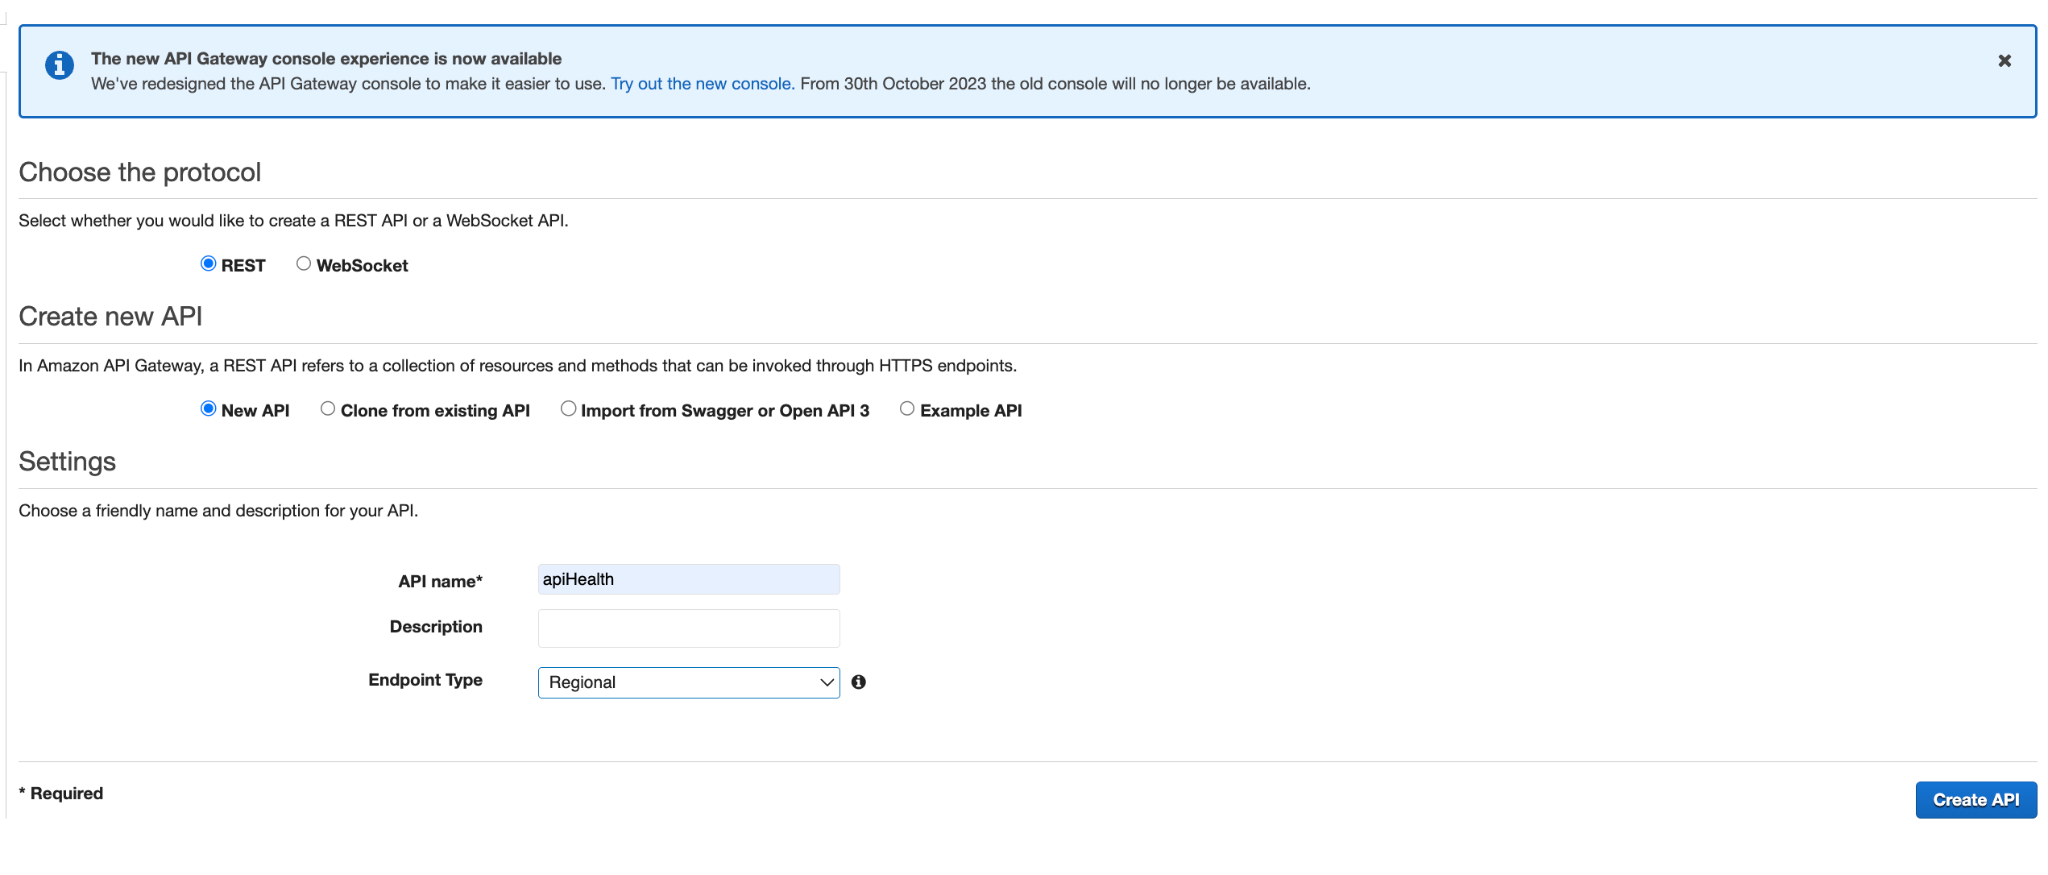
- We are implementing a REST API, so navigate to REST API and click on 'Build'.
- Select the protocol as REST and choose 'New API’.
- In the settings, enter your health check API name, select the Endpoint Type as 'Regional,' and click on 'Create API’.
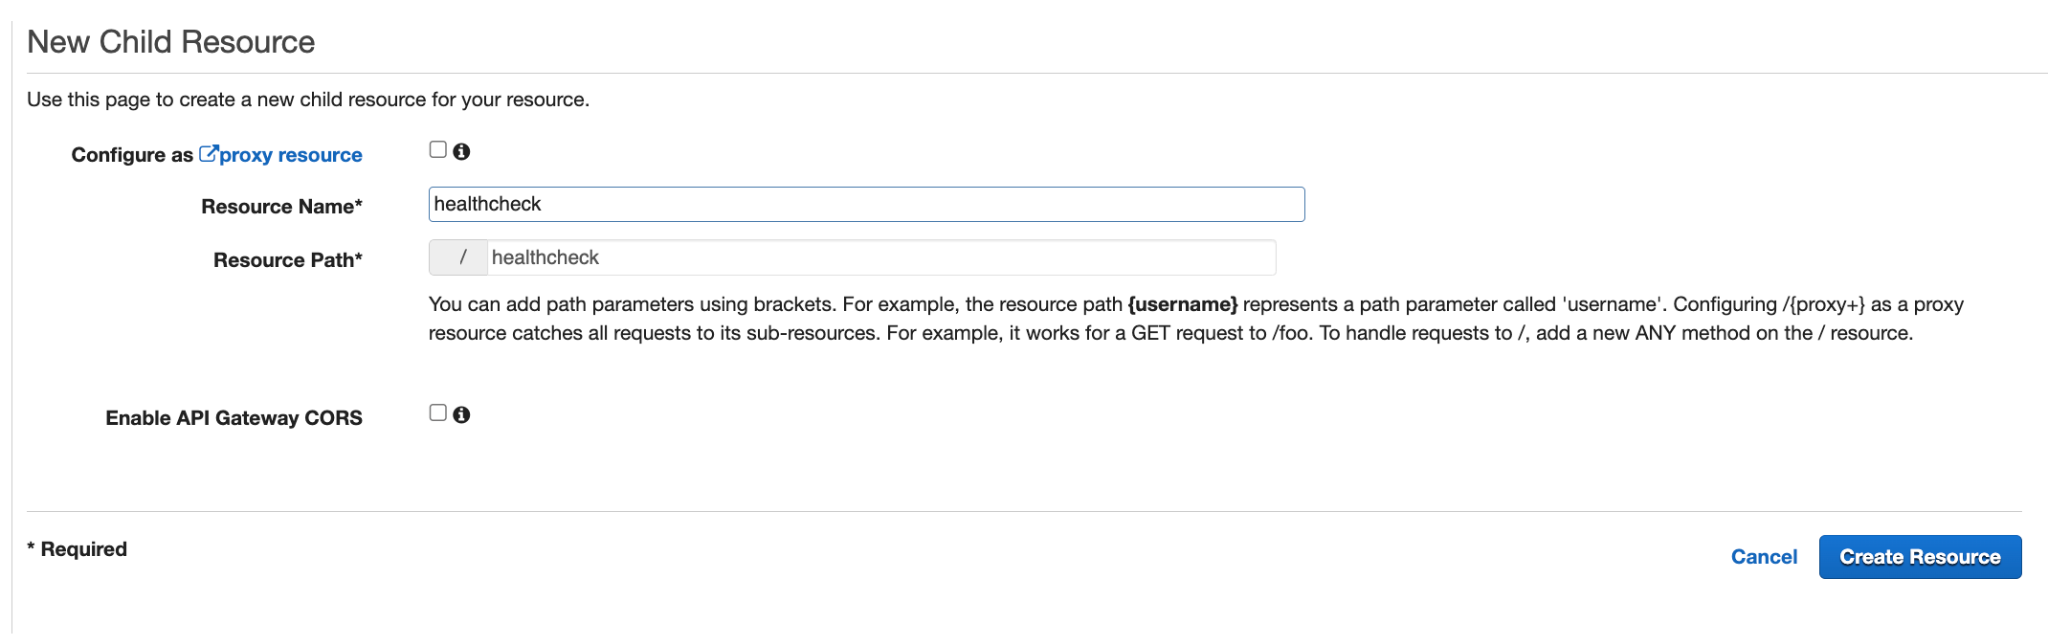
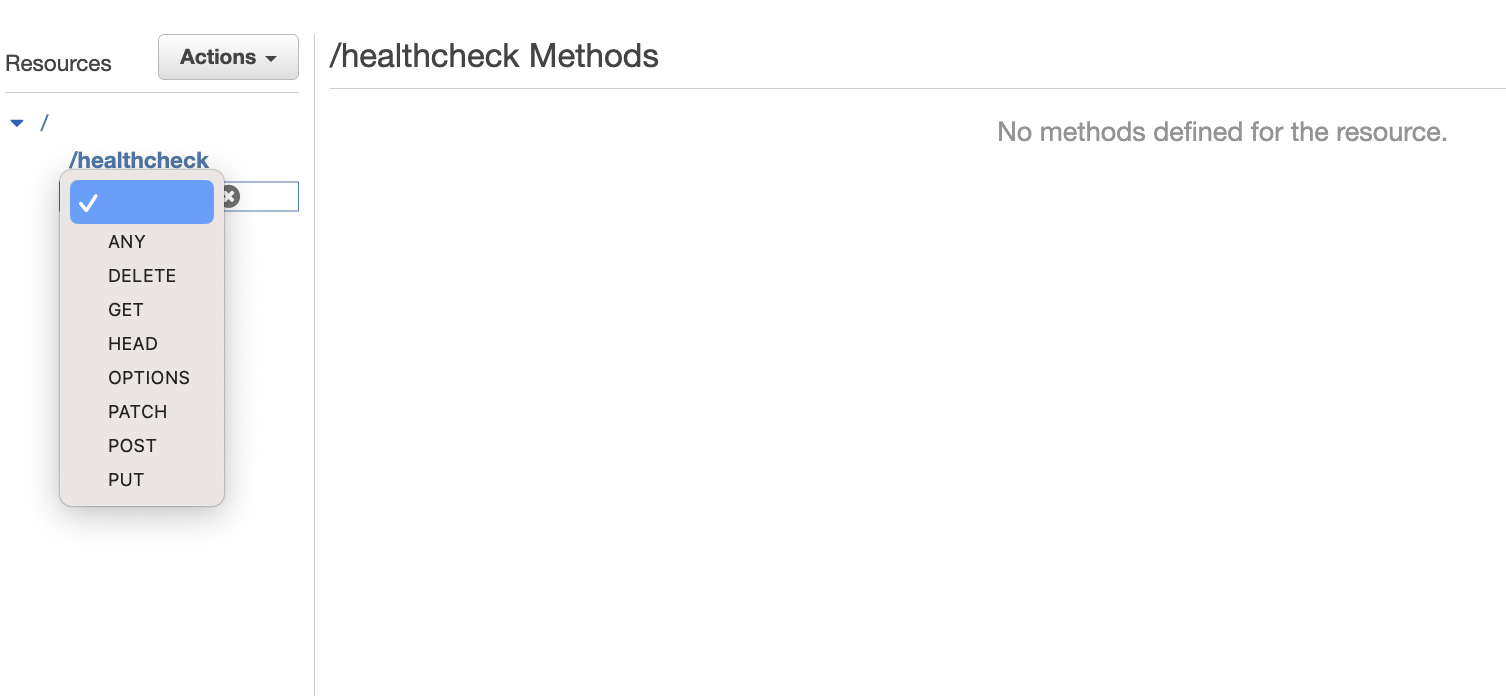
- Now go to 'API,' click on 'Action,' then 'Create Resource.' Provide the resource name as 'healthcheck' and click 'Create Resource'.
- Now, click on 'Create Method' and select 'ANY' from the drop-down options.
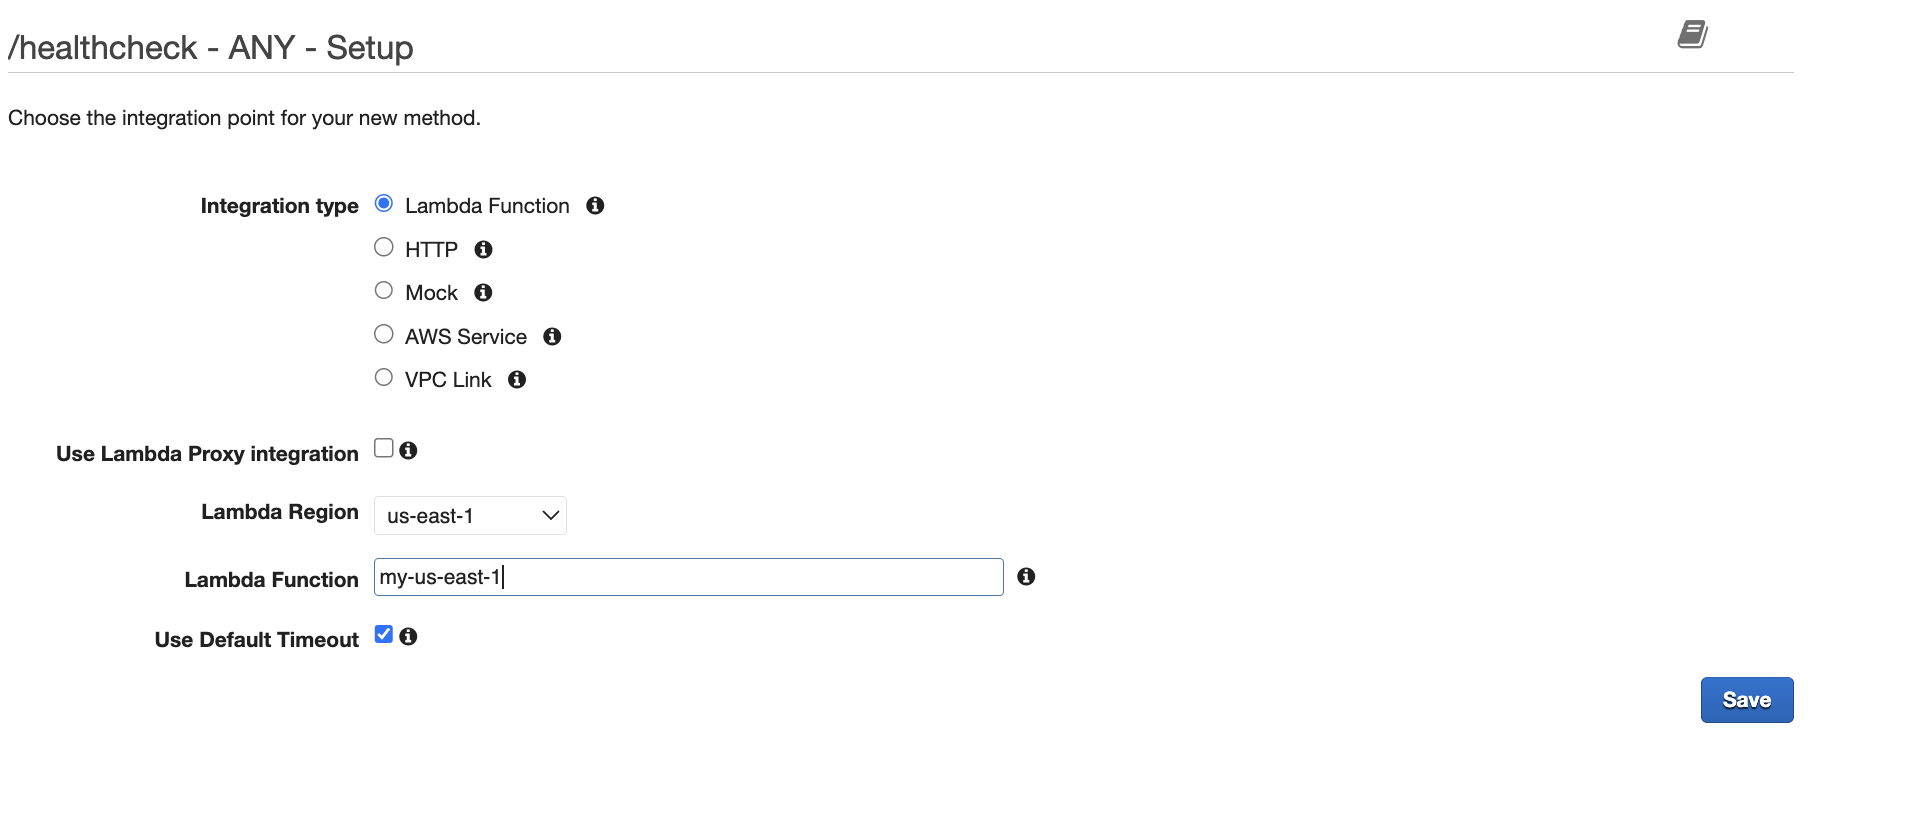
- Select 'Lambda Function' as the Integration Type, choose your Lambda Region, provide the Lambda Function Name, and click 'Save’.
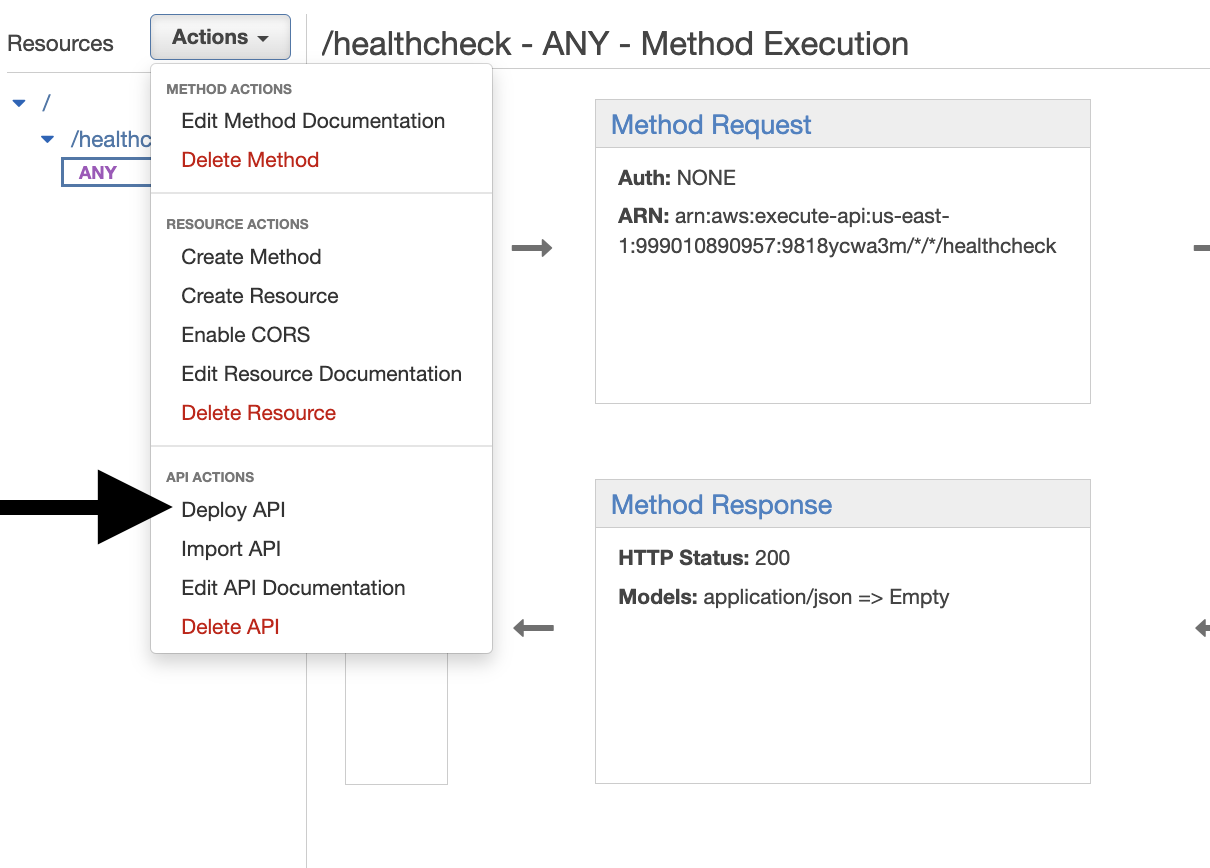
- Now Click on Deploy API from the Action menu
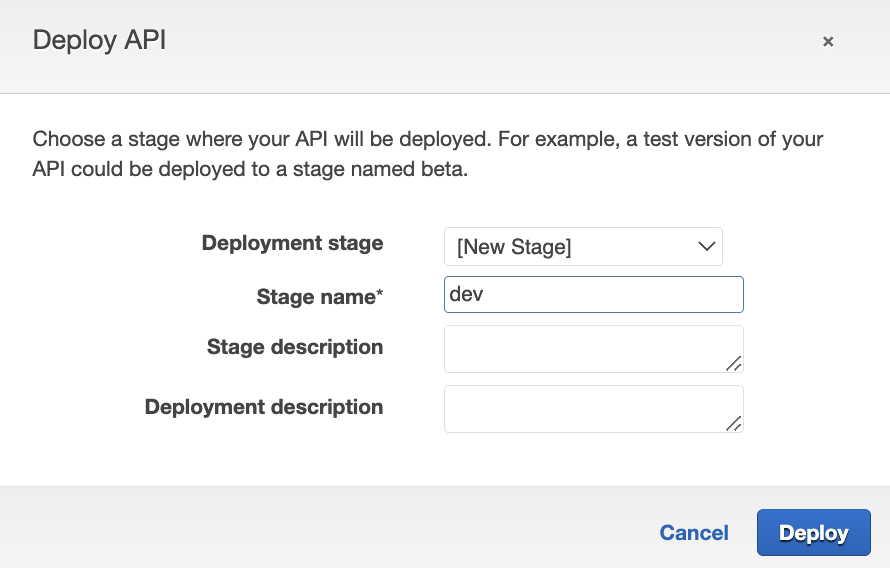
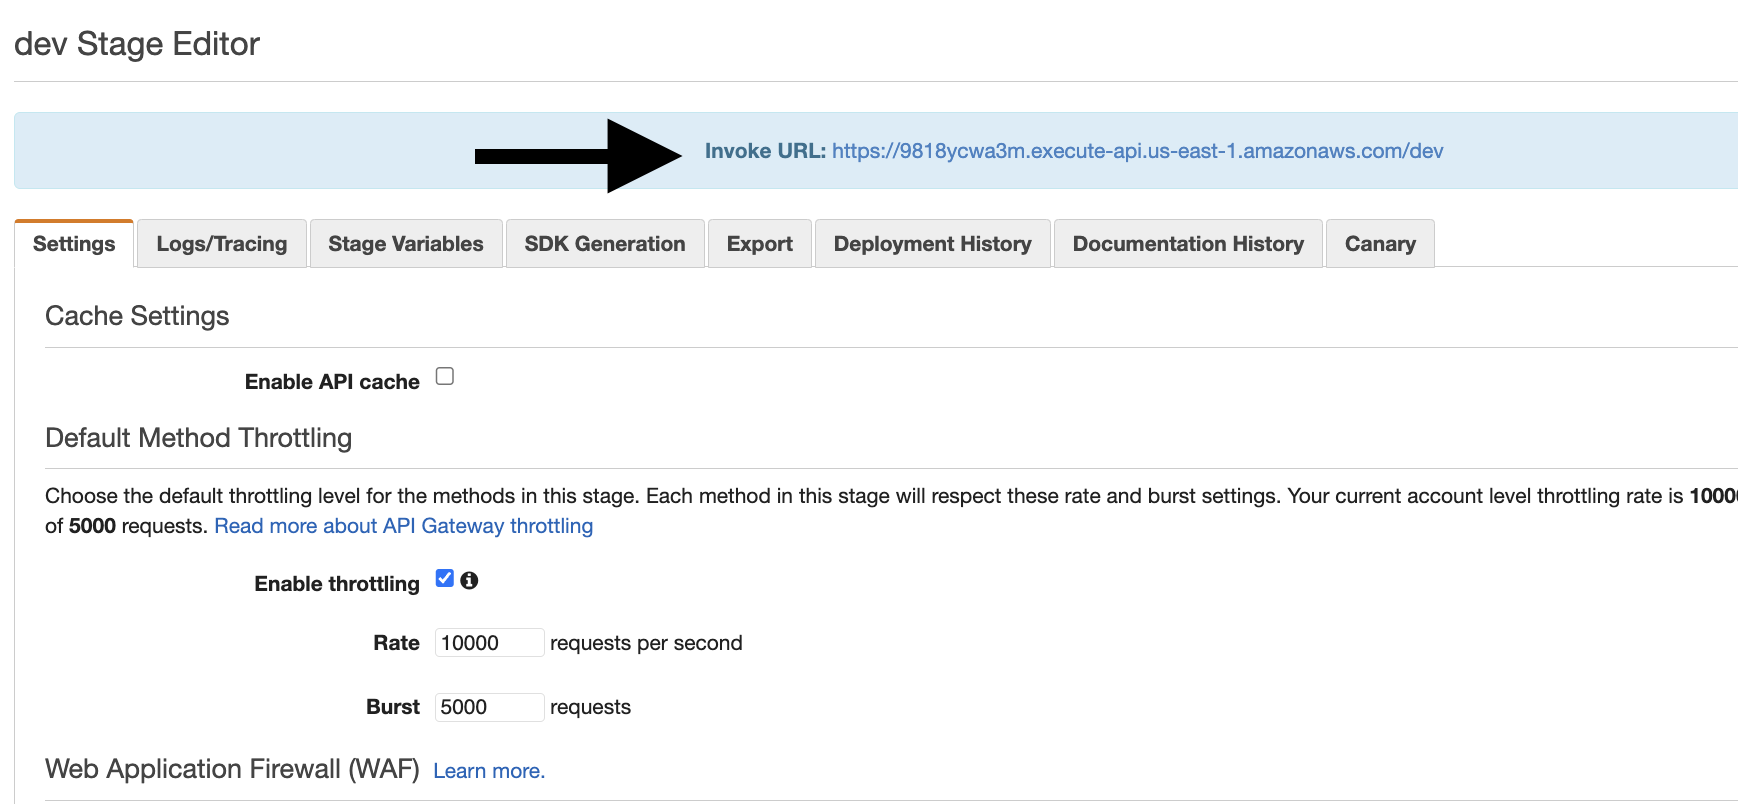
- Provide the deployment stage (create new as dev) and click on 'Deploy'.
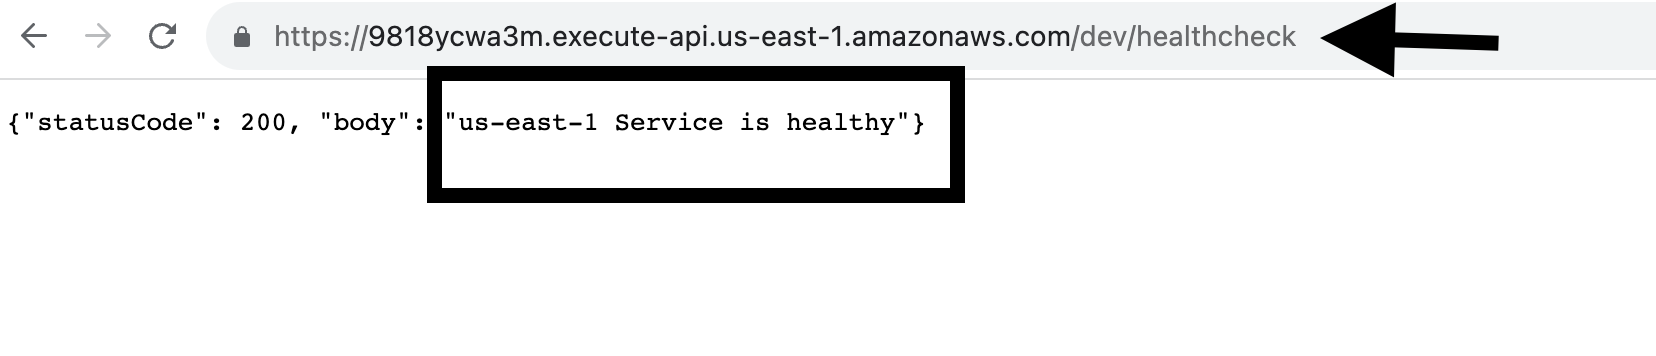
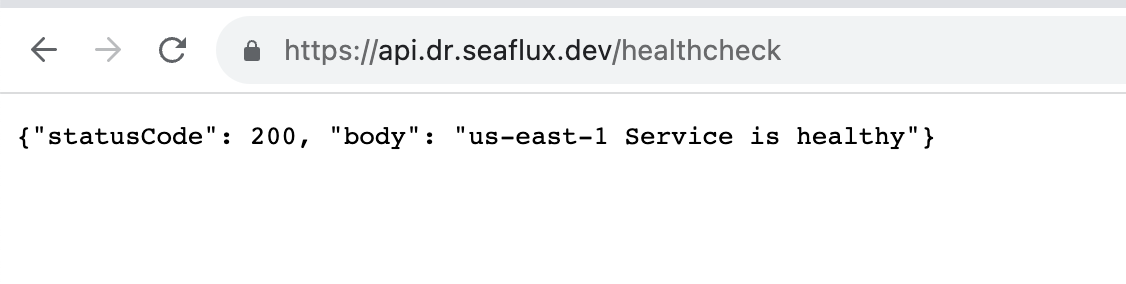
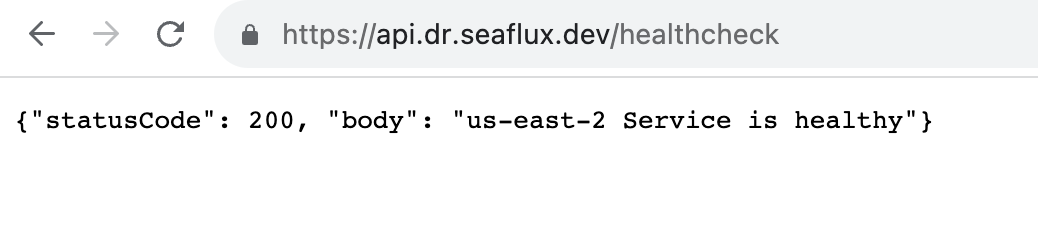
- It will provide you with a temporary URL to check the API. Simply click on the given URL and append '/healthcheck' at the end of the URL to trigger your Lambda function.
- Now, it will display the status of your healthy region.
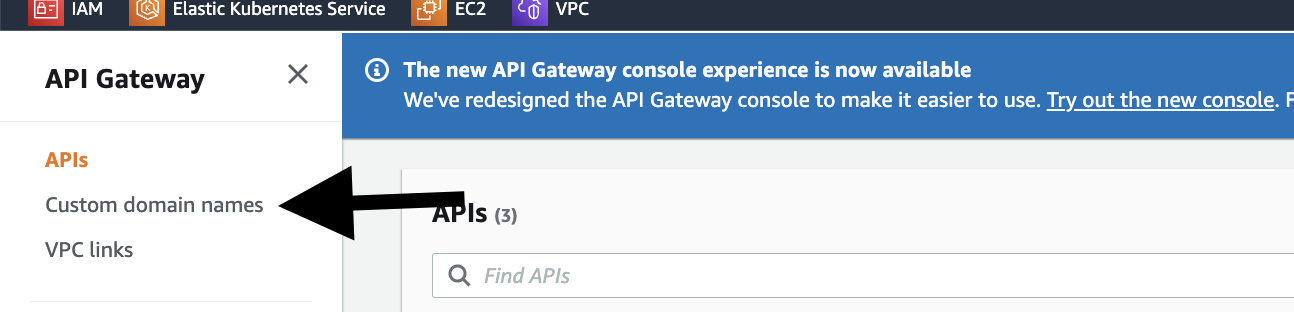
- Let's add a custom domain with API Gateway
- Go to Custom domain names on the Left Panel of API Gateway
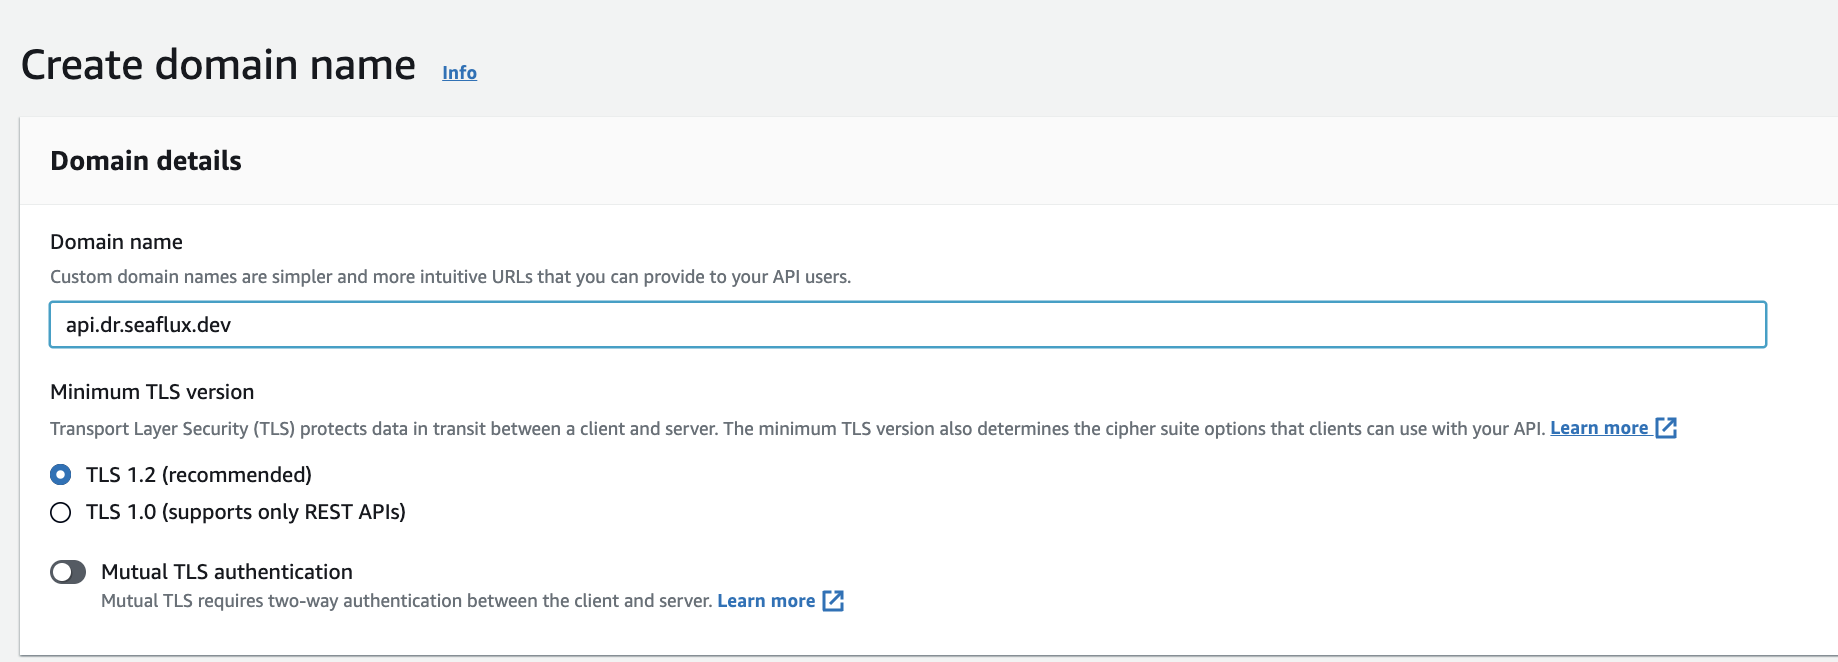
- Click on Create Option
- Insert Your domain name
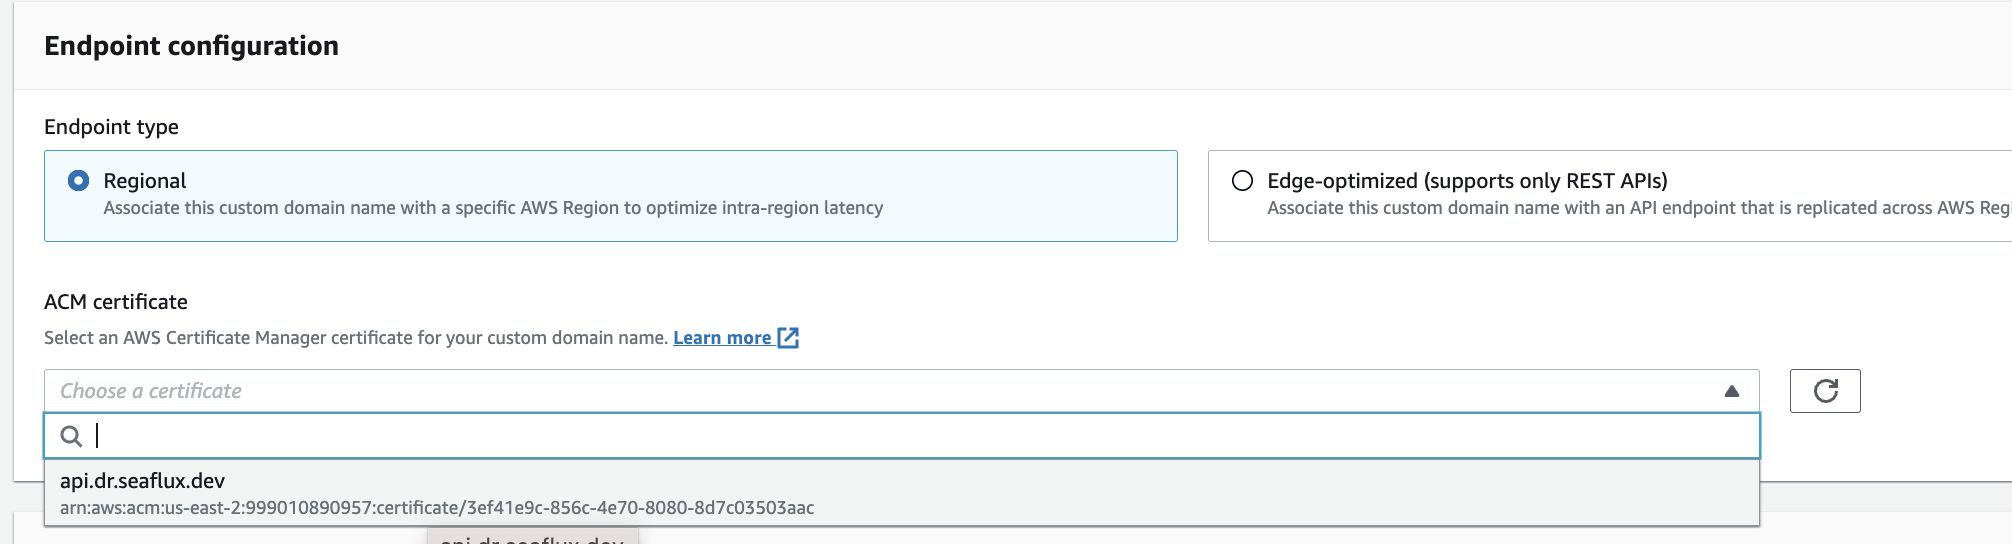
- Now, select ACM (AWS Certificate Manager) from the Endpoint Configuration option, and click on 'Create Domain Name'.
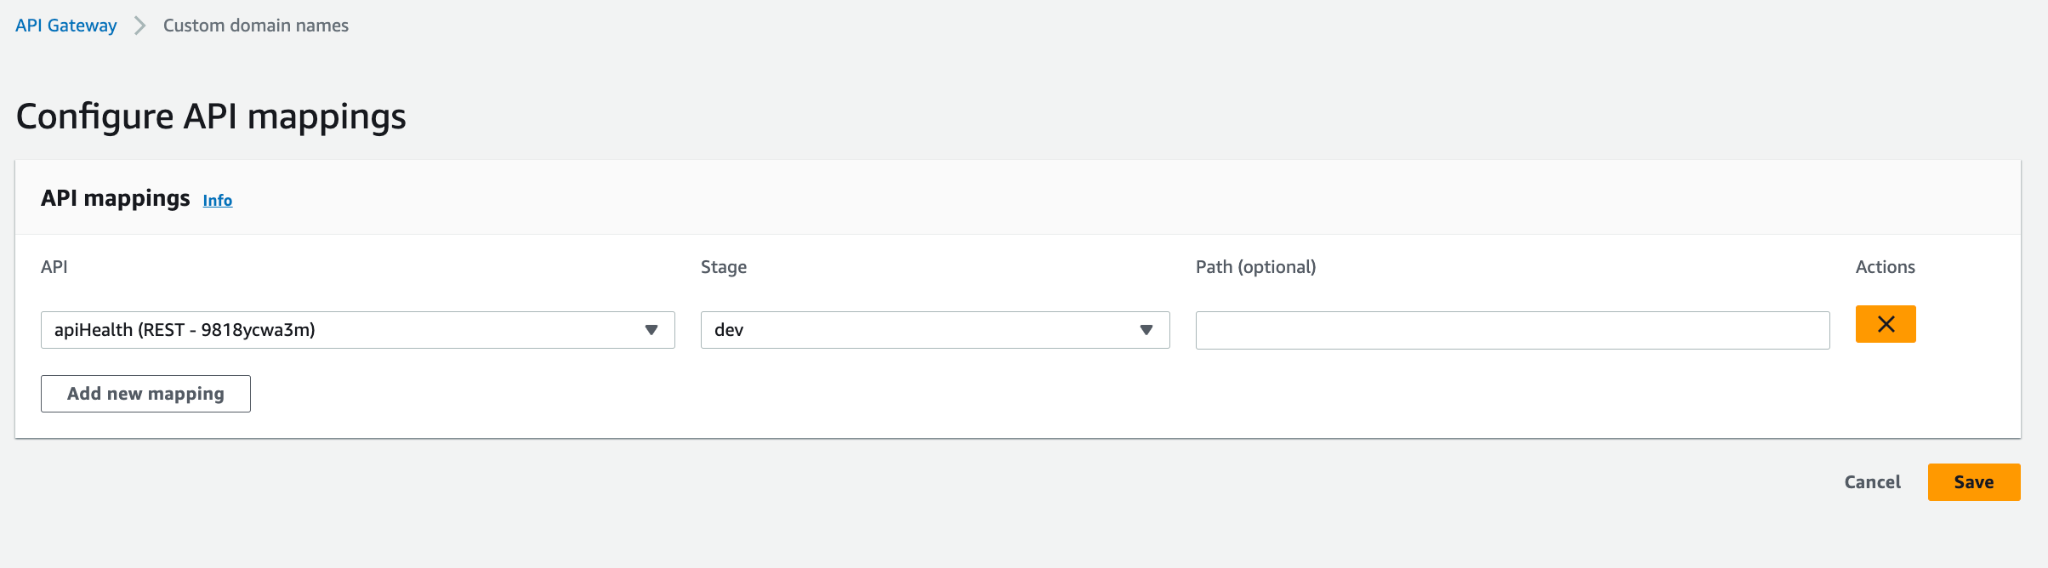
- Click on the 'API Mapping' tab, then 'Configure API Mapping.' Add a new mapping and select your 'healthcheck' API and stage.
Follow the same process in the Secondary region, such as US-EAST-2.
Amazon Route 53 Application Recovery Controller
Amazon Route 53 Application Recovery Controller lets you know if your applications and resources are ready for recovery. Across the AWS Availability Zones (AZs) or Regions, the Application Recovery Controller also helps you manage and coordinate recovery for your applications. It reduces the manual steps required by traditional tools and processes and makes recoveries simpler and more reliable.
- Navigate to the AWS Management Console dashboard and search for "Route 53 Application Recovery Controller".
- We are setting up a regional failover setup with Route 53 Application Recovery Controller, so navigate to 'Multi-region' in the left panel.
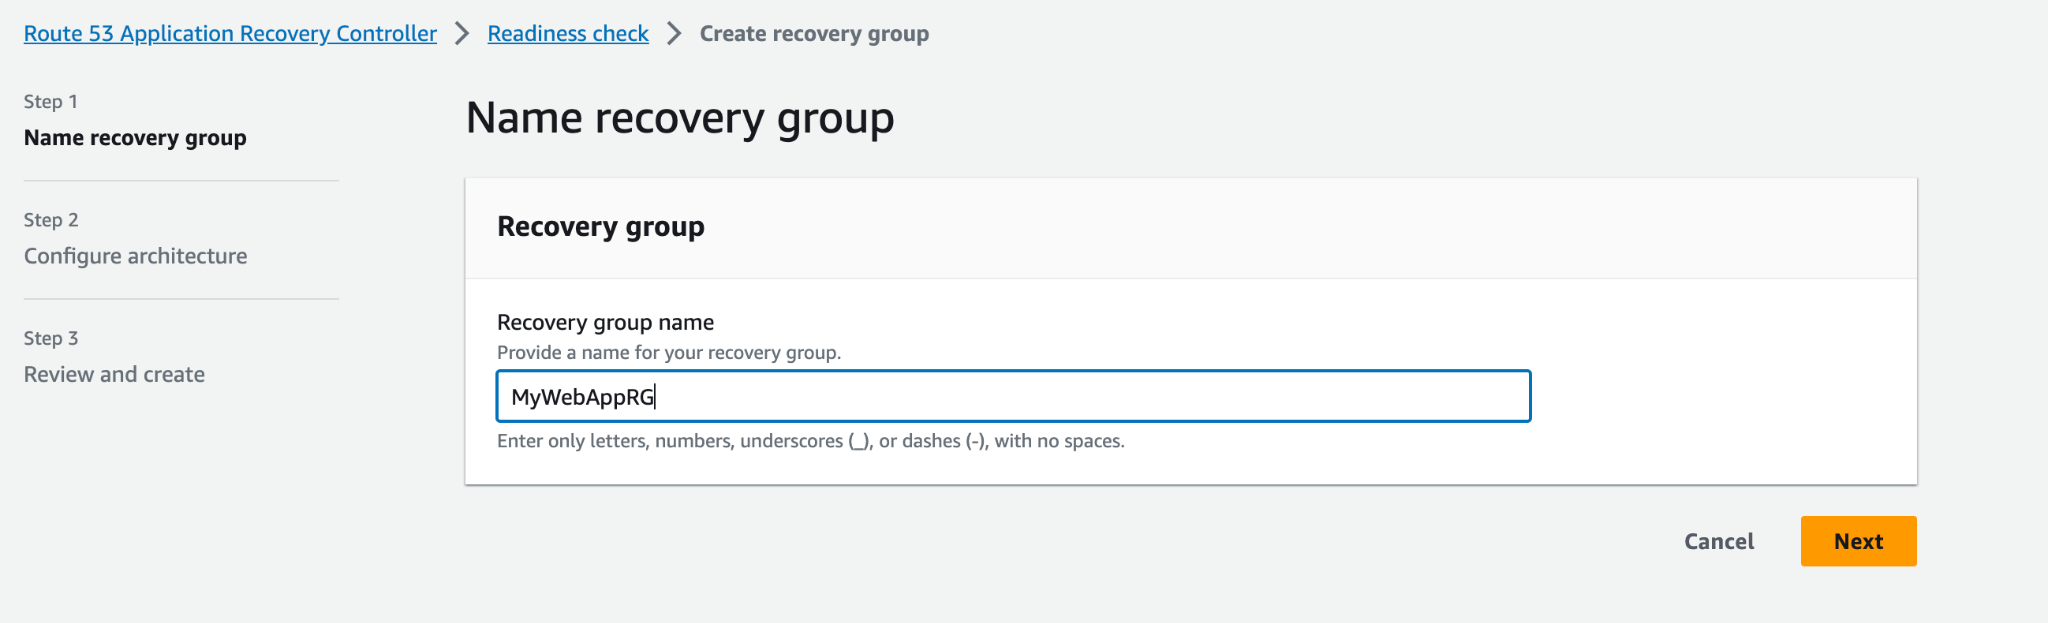
- To begin, we need to set up a recovery group. Click on 'Readiness Check,' then click on 'Create a new Recovery Group.' Provide a Recovery Group name and click 'Next'.
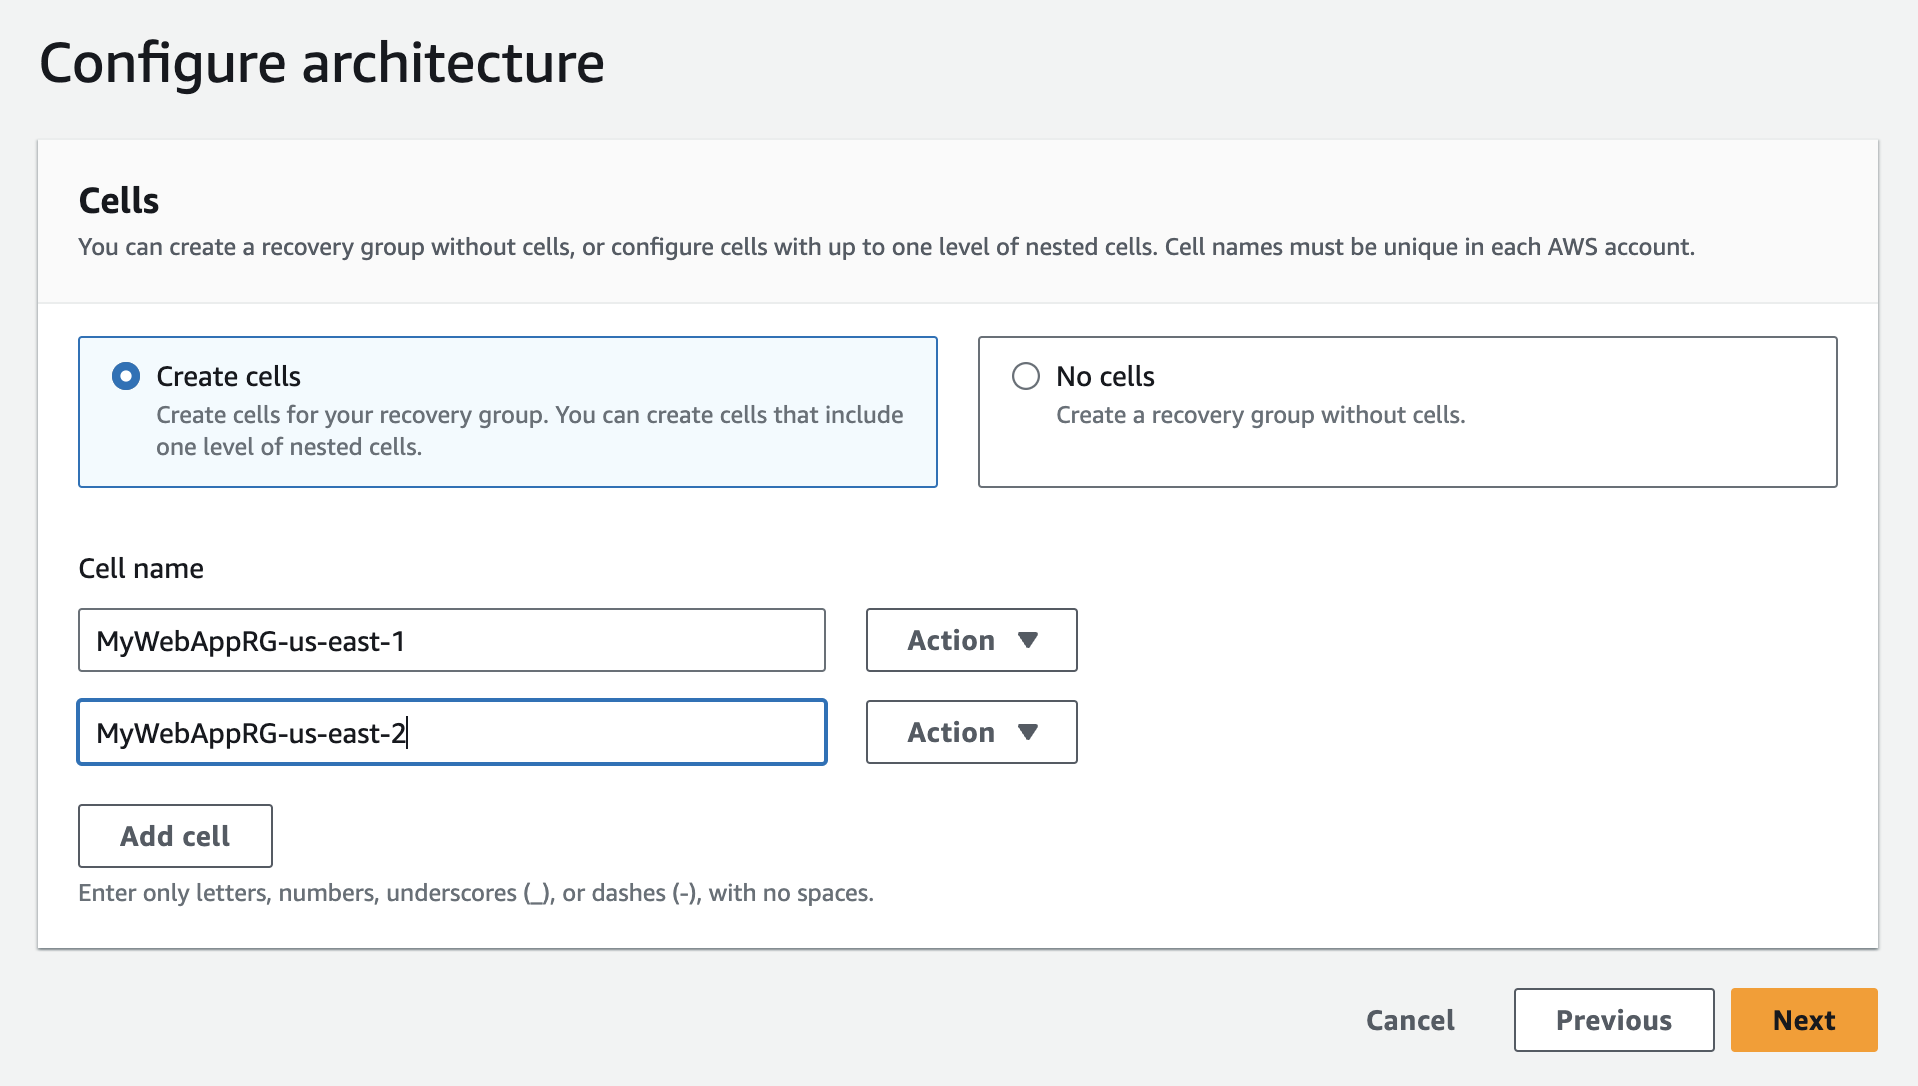
- Now we need to add a cell. So click on 'Create Cell' and then 'Add Cell'.
- Provide East region cell name, click on 'Next', and then 'Create Recovery Group'
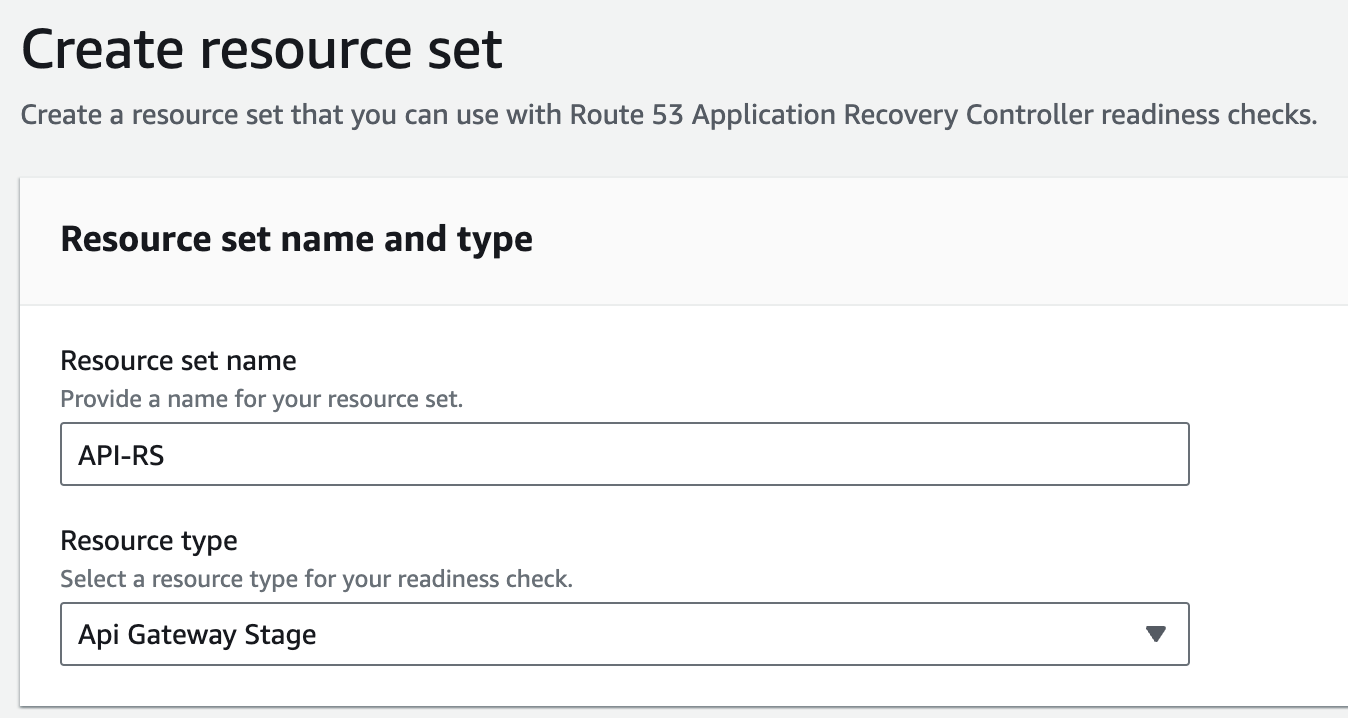
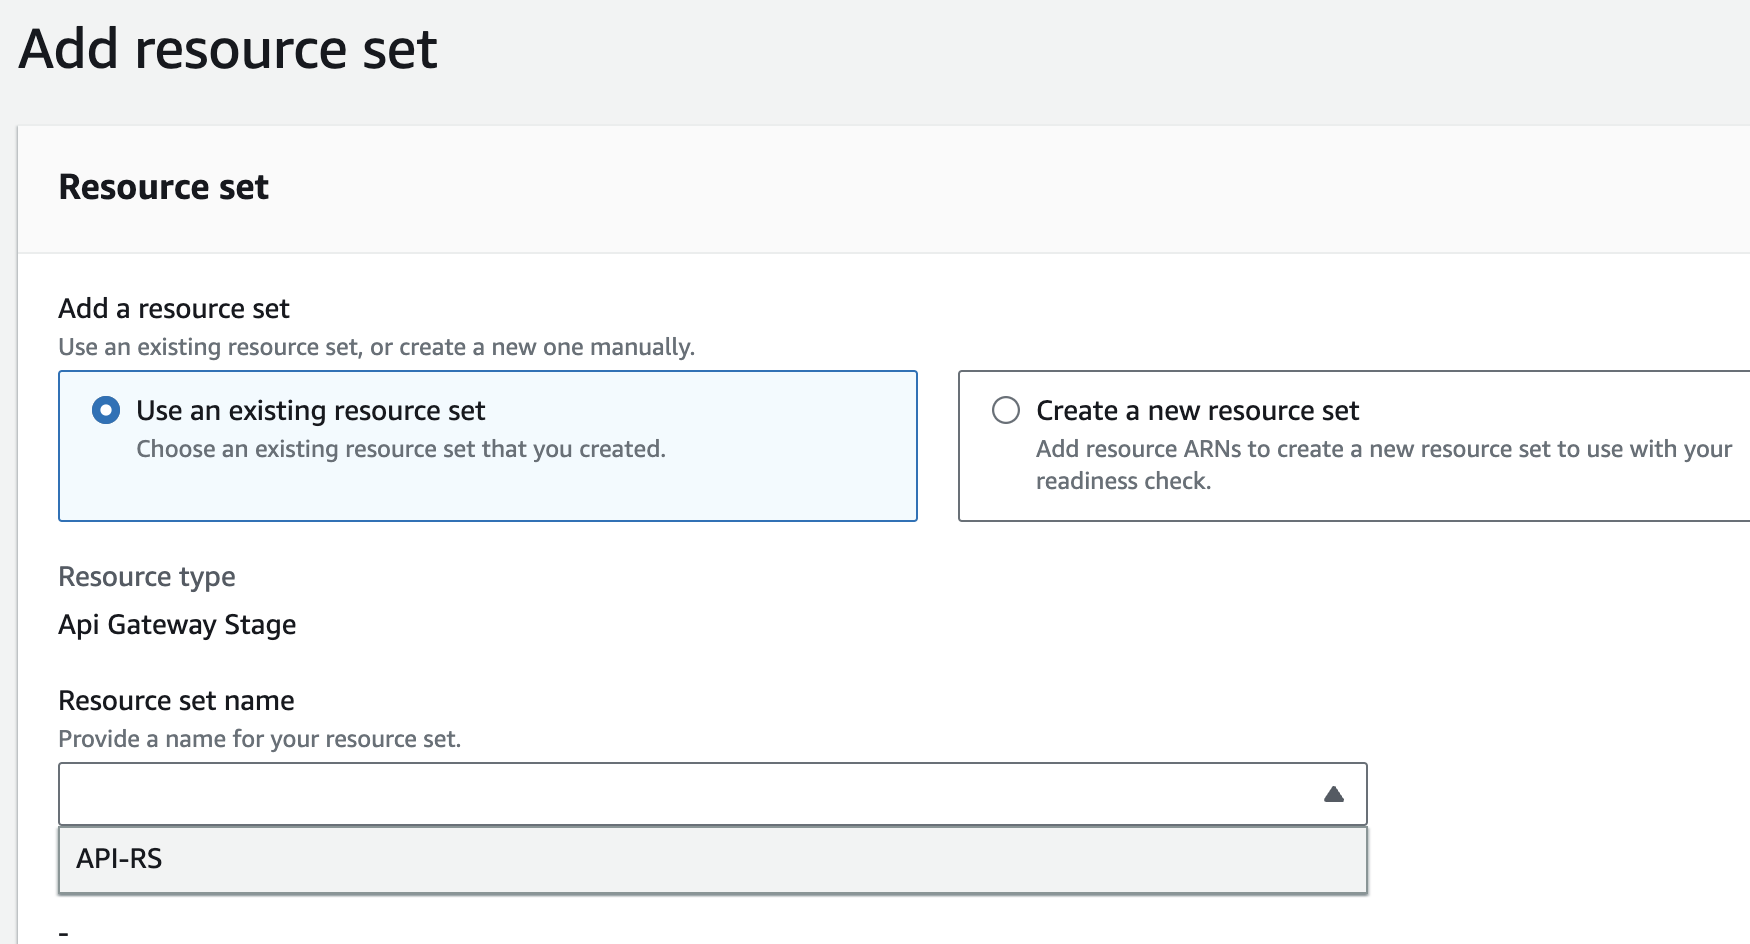
- Then we need to create a resource set. Click on 'Create'
- Provide resource set name and select API Gateway from the drop-down menu
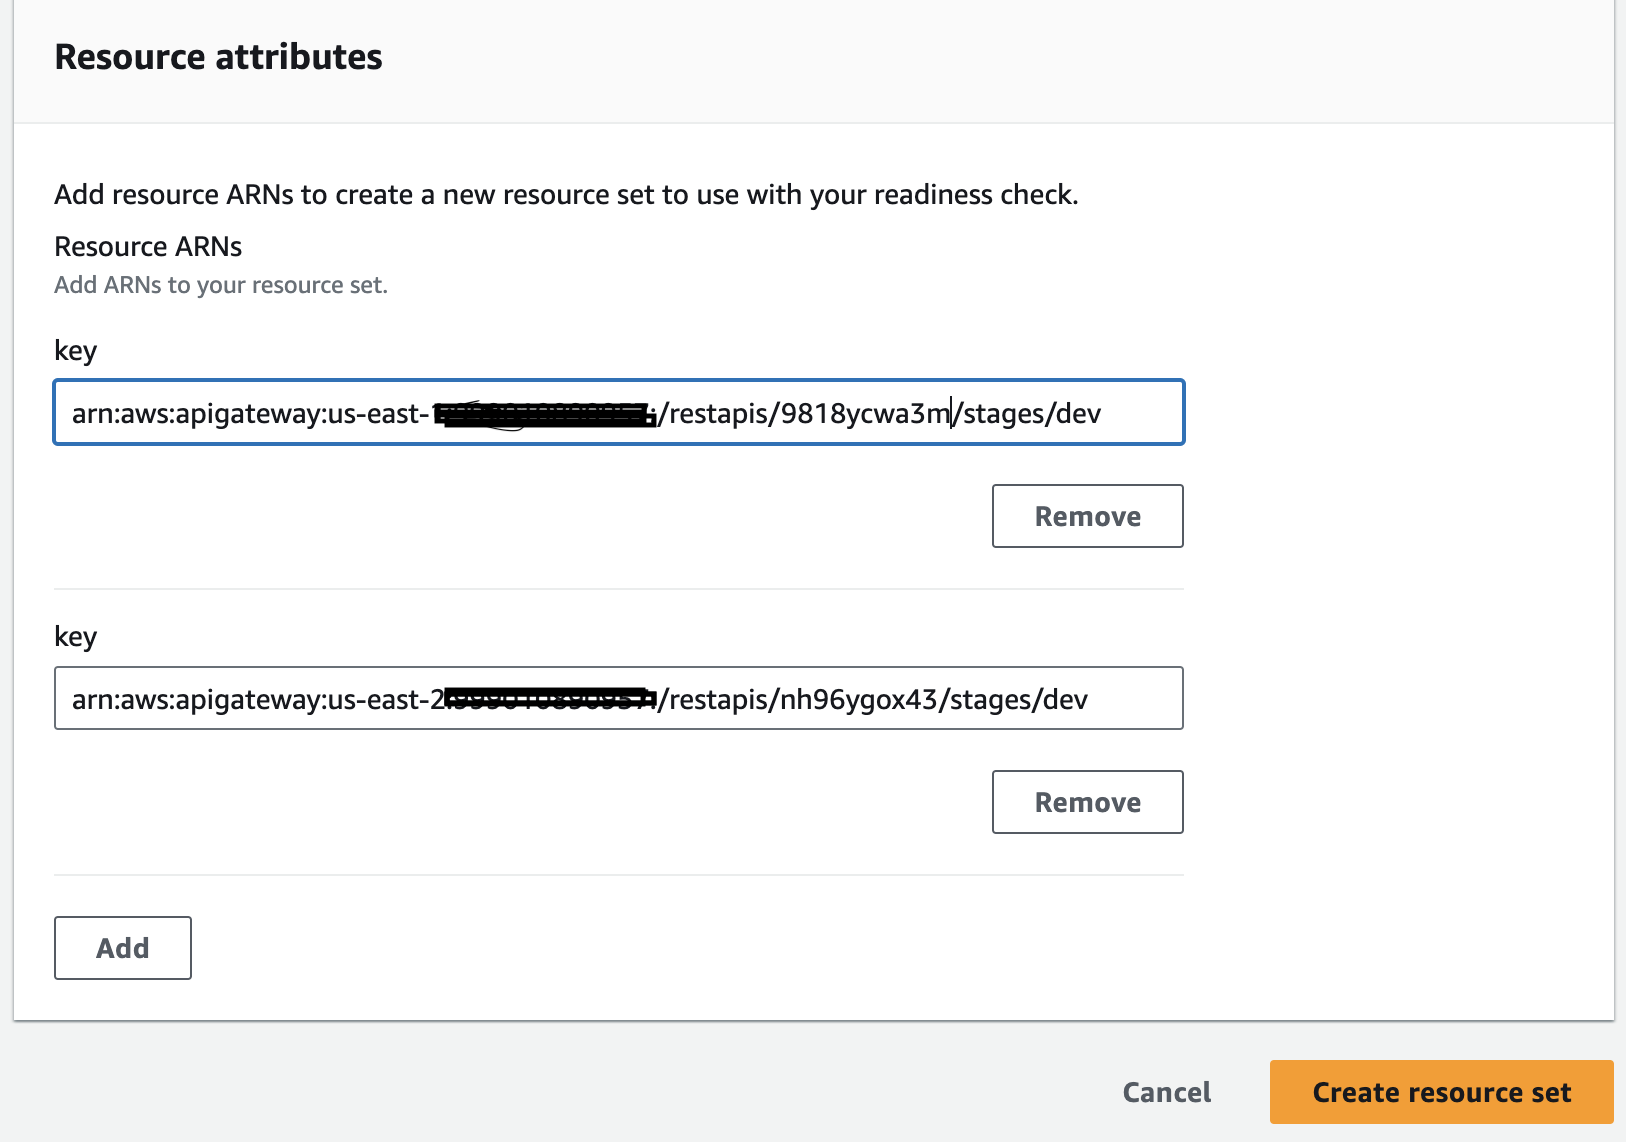
- Now add your API Gateway stage ARN in the 'key' and click 'Create Resource Set'
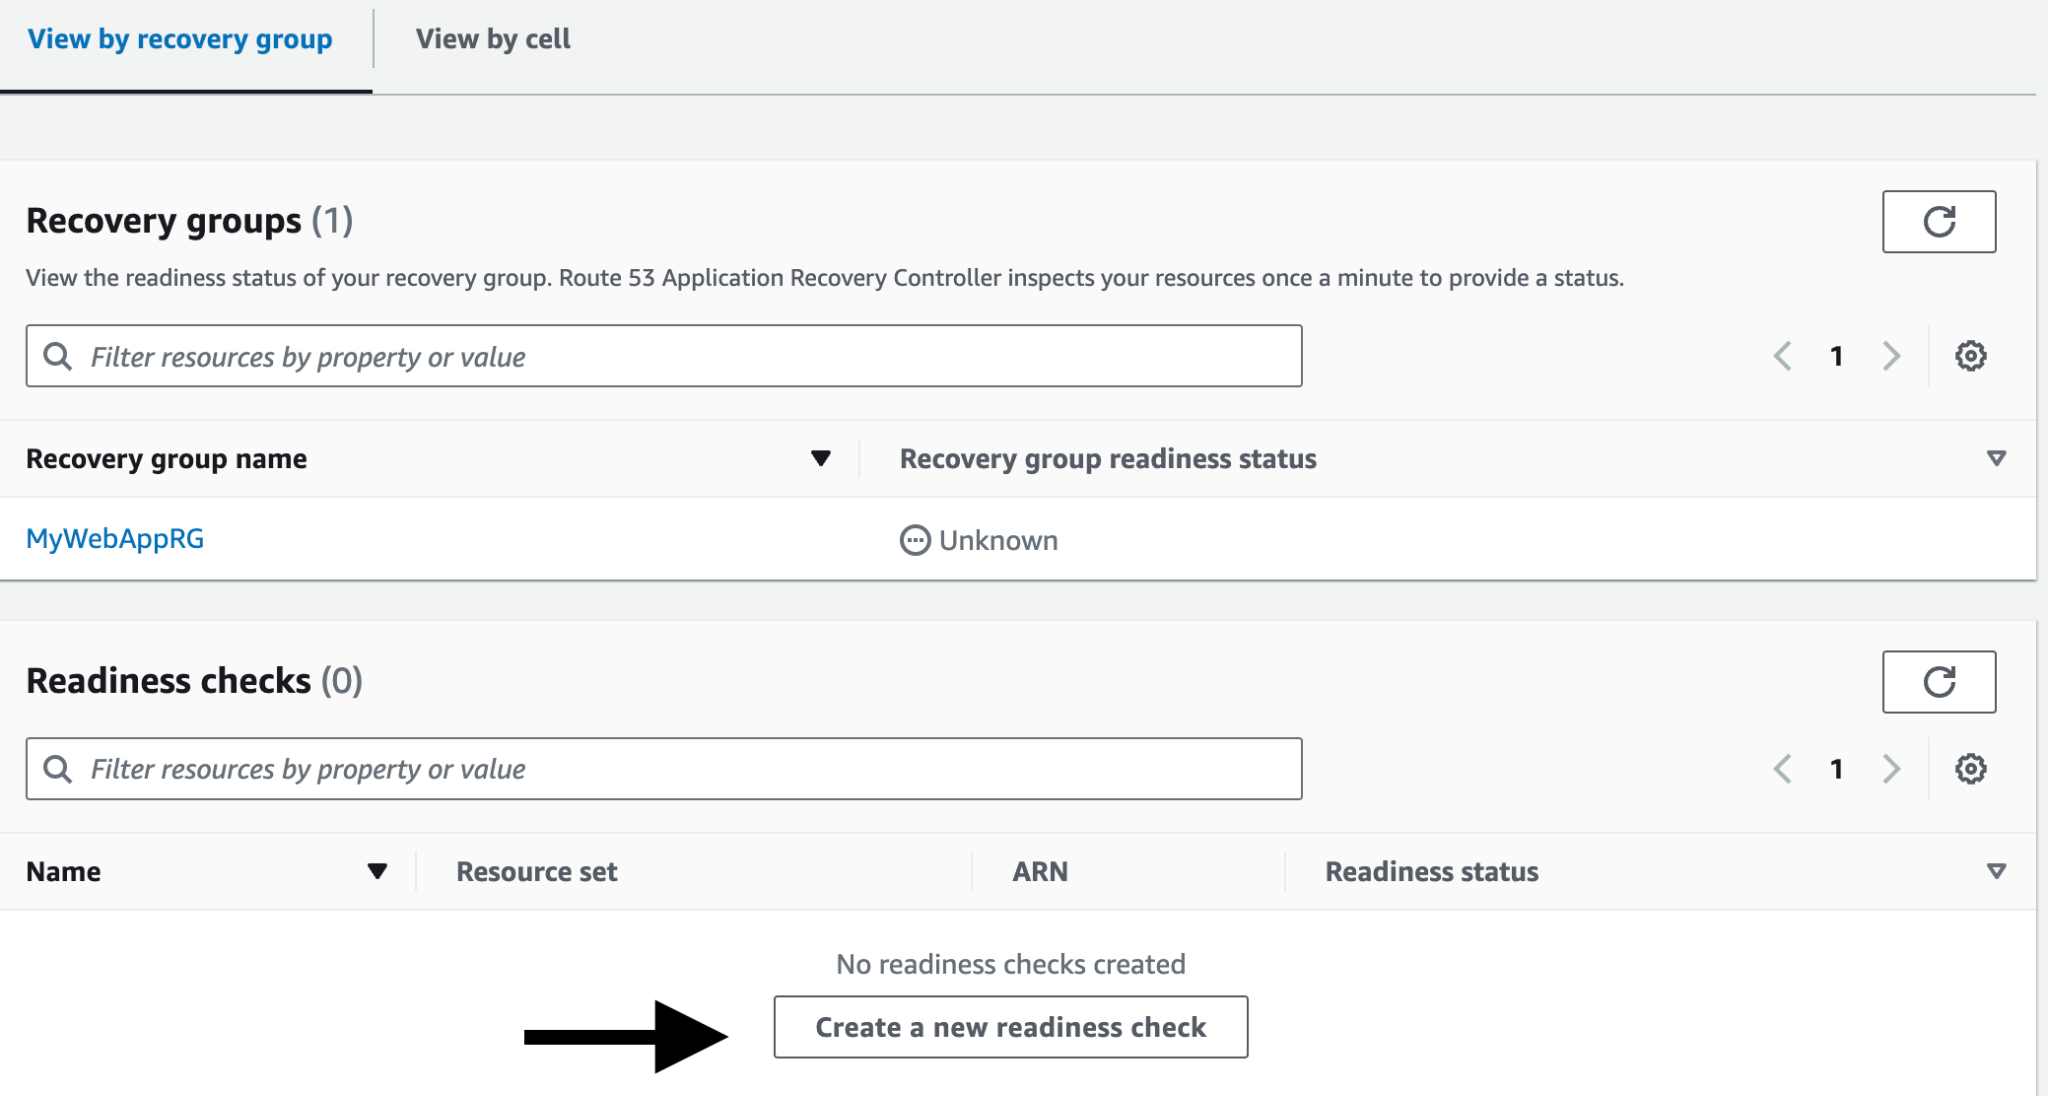
- Now create a readiness check. Click on 'Create a new readiness check'
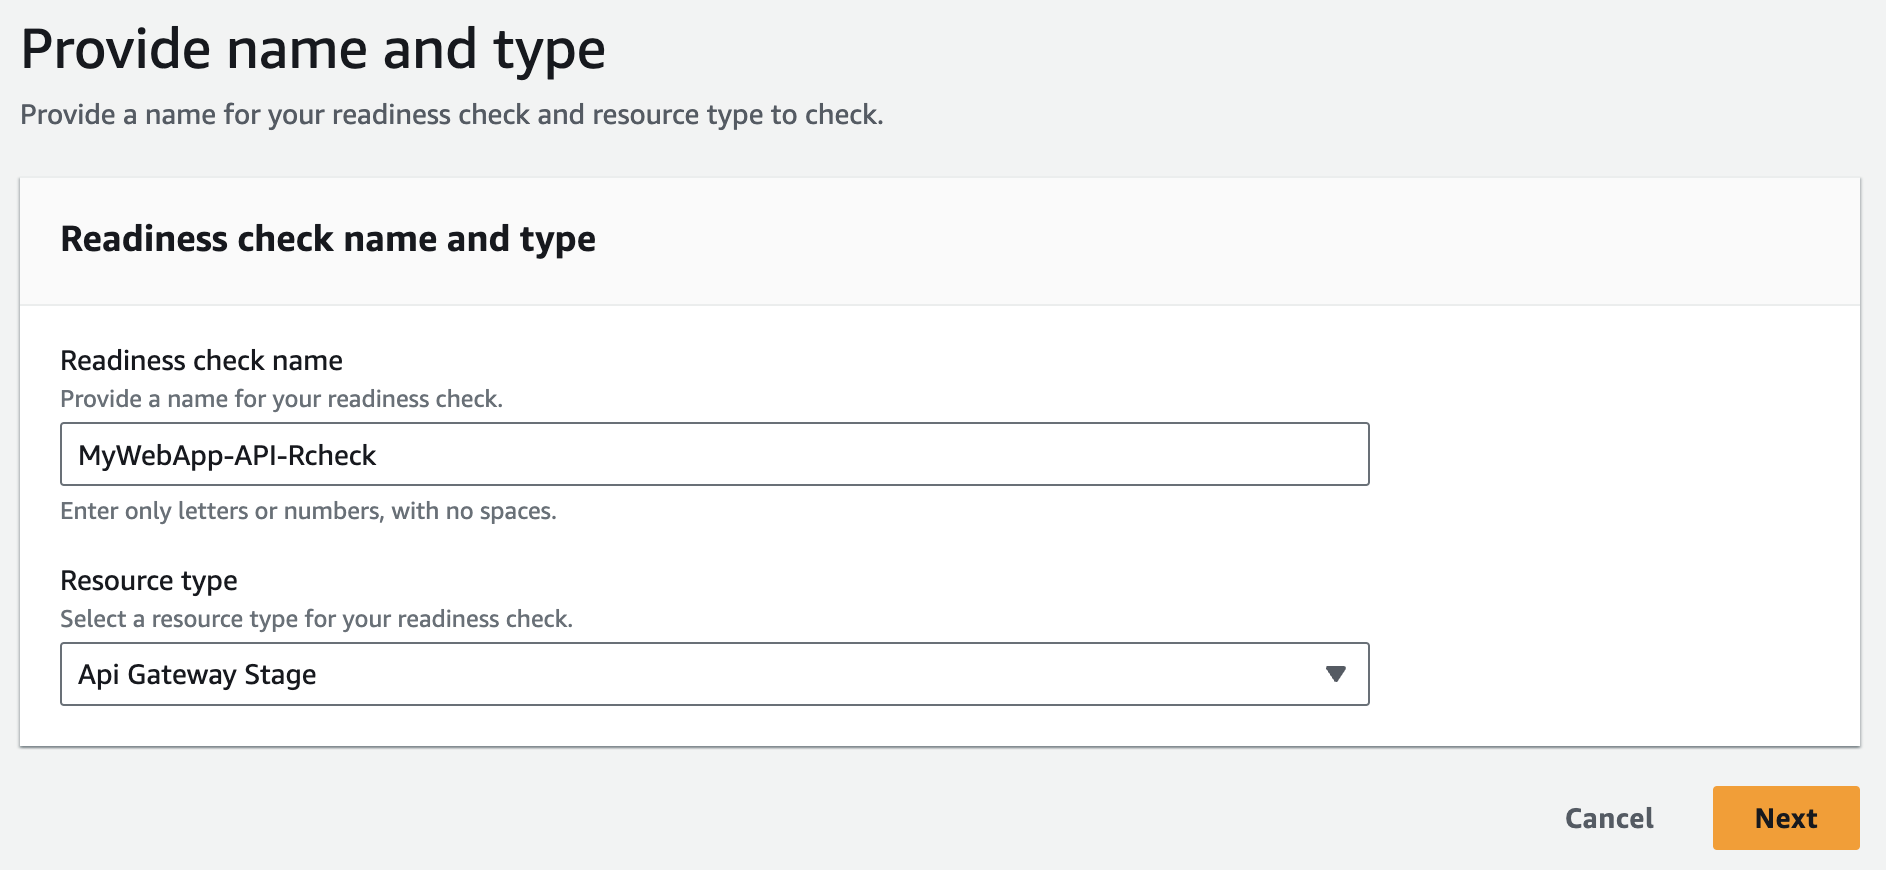
- Provide readiness check name and resource type and click on 'Next'
- Add resource set, select existing Resource name, and click 'Next'
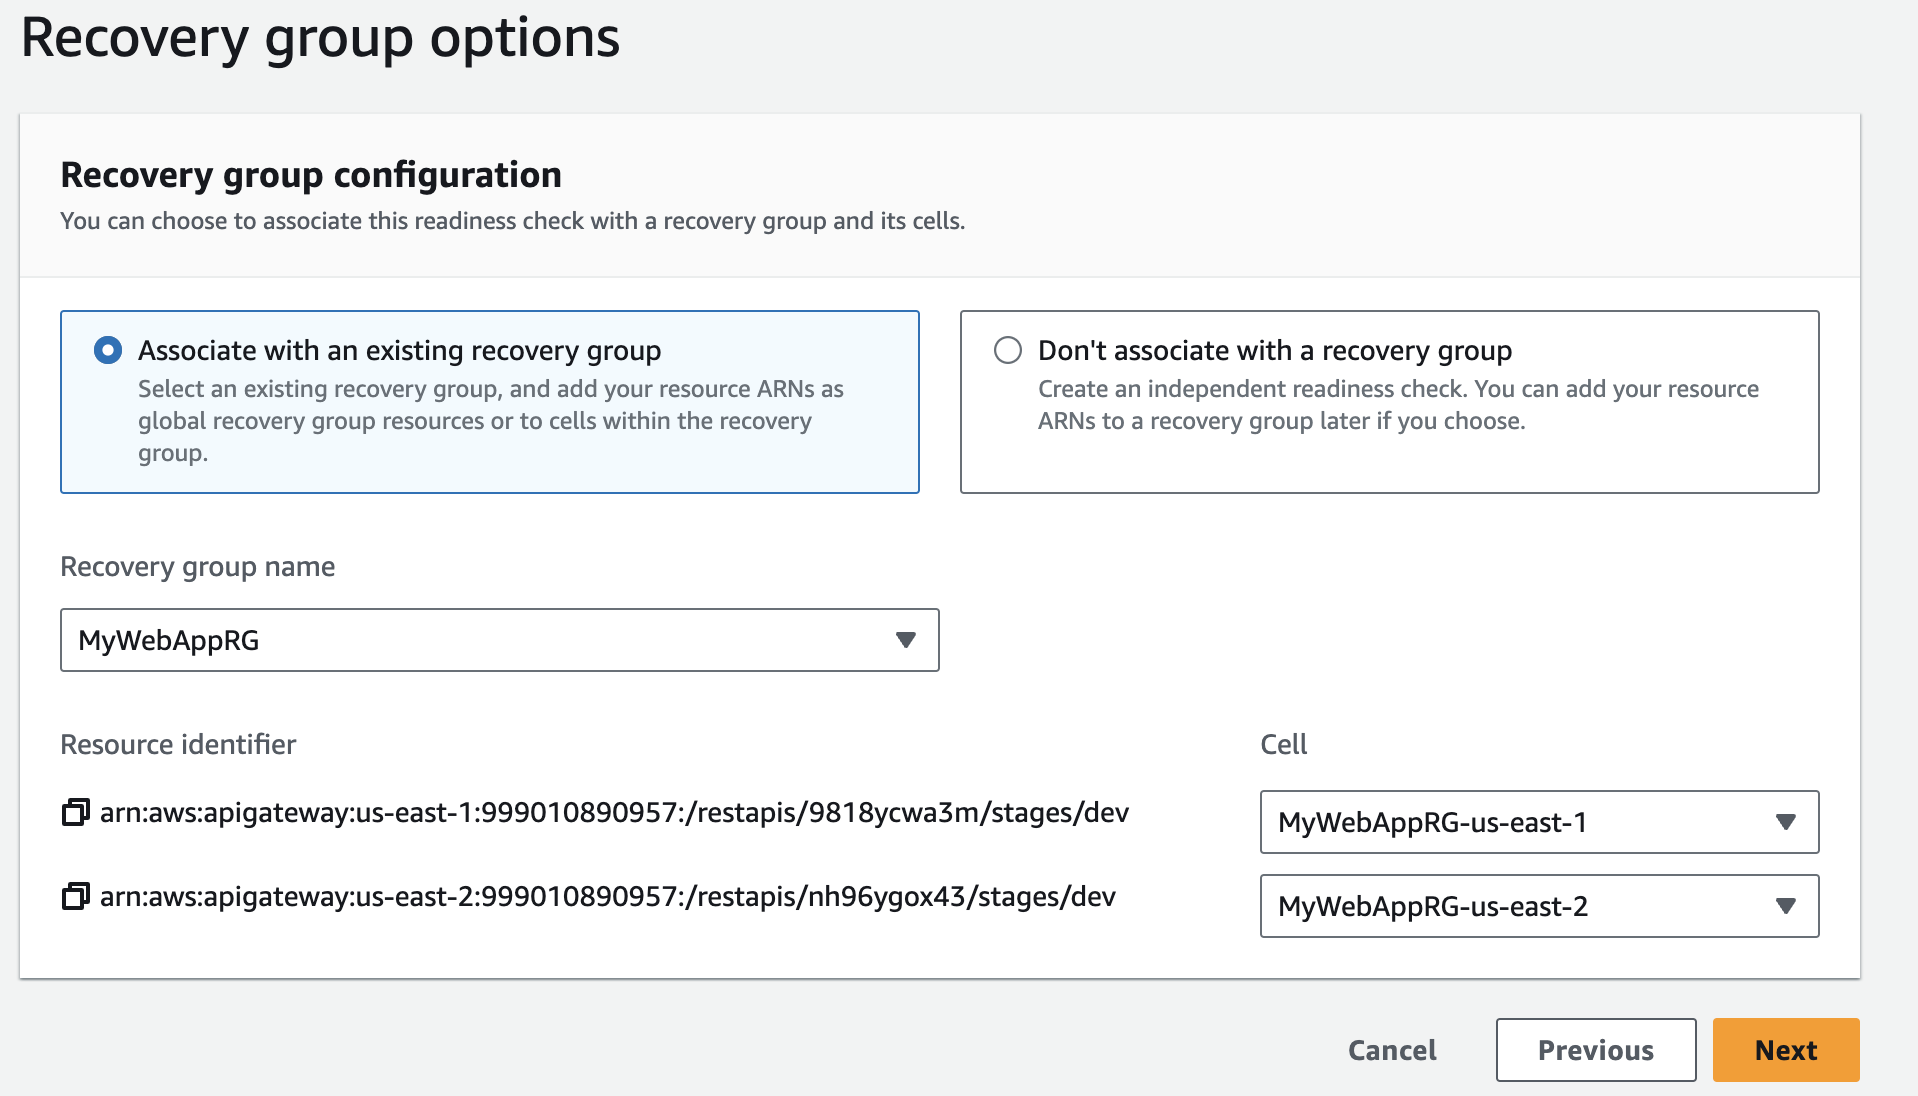
- Select 'Recovery group options,' choose resources, provide a cell for each identifier region-wise, and click 'Next' to create the readiness check.
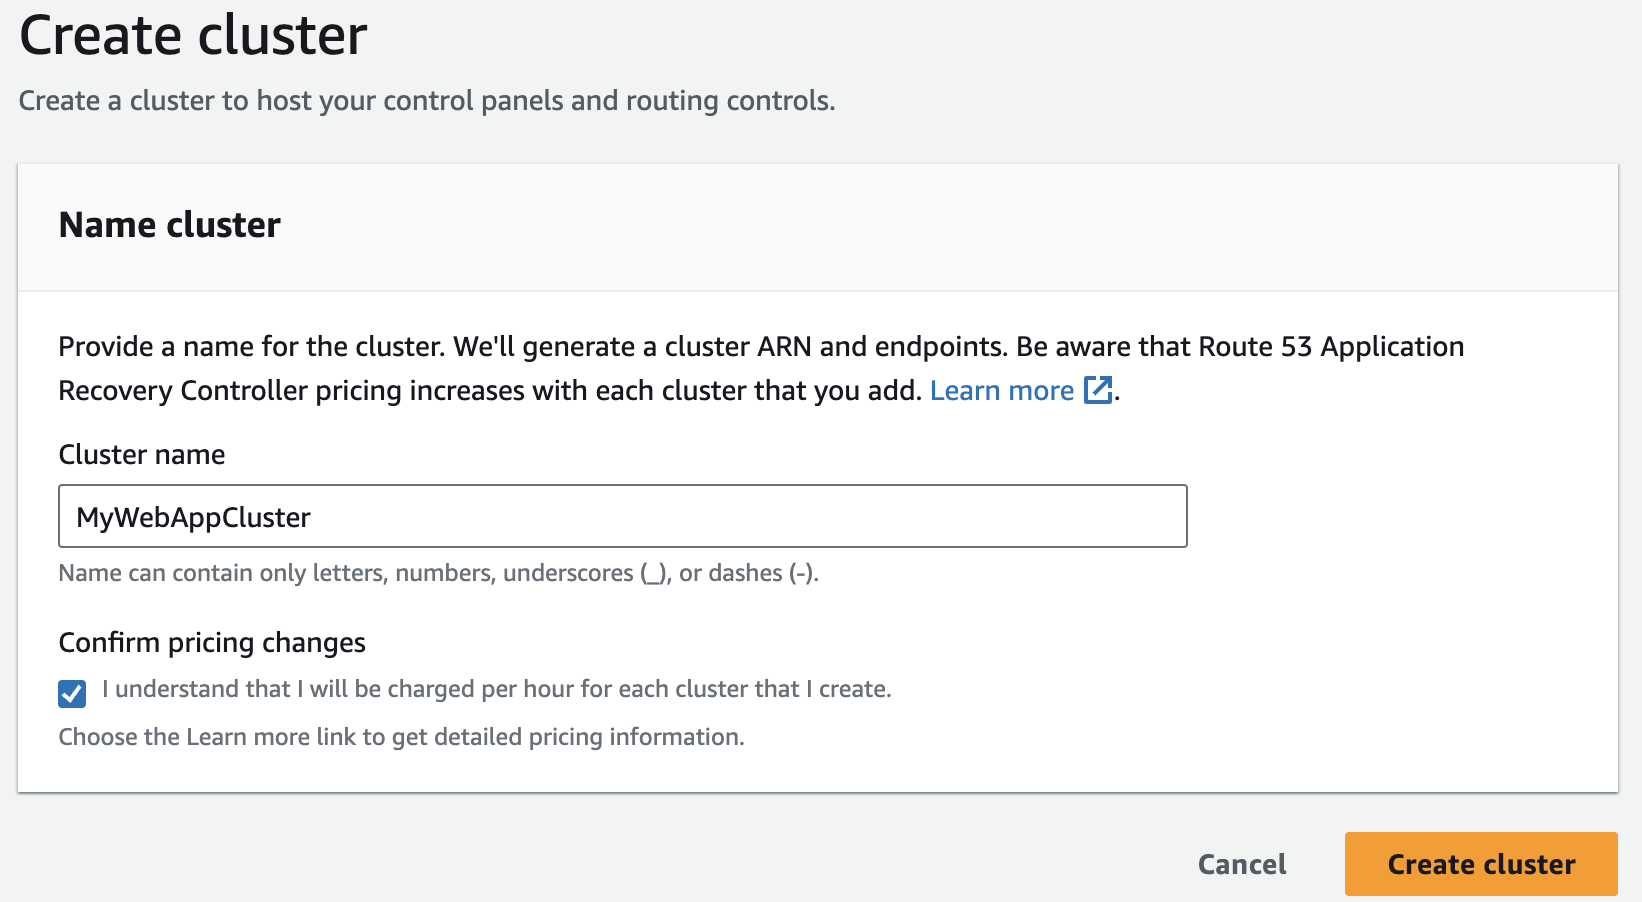
- Now Click on 'Clusters' and then click on 'Create'
- Provide cluster name and click on 'Create cluster'
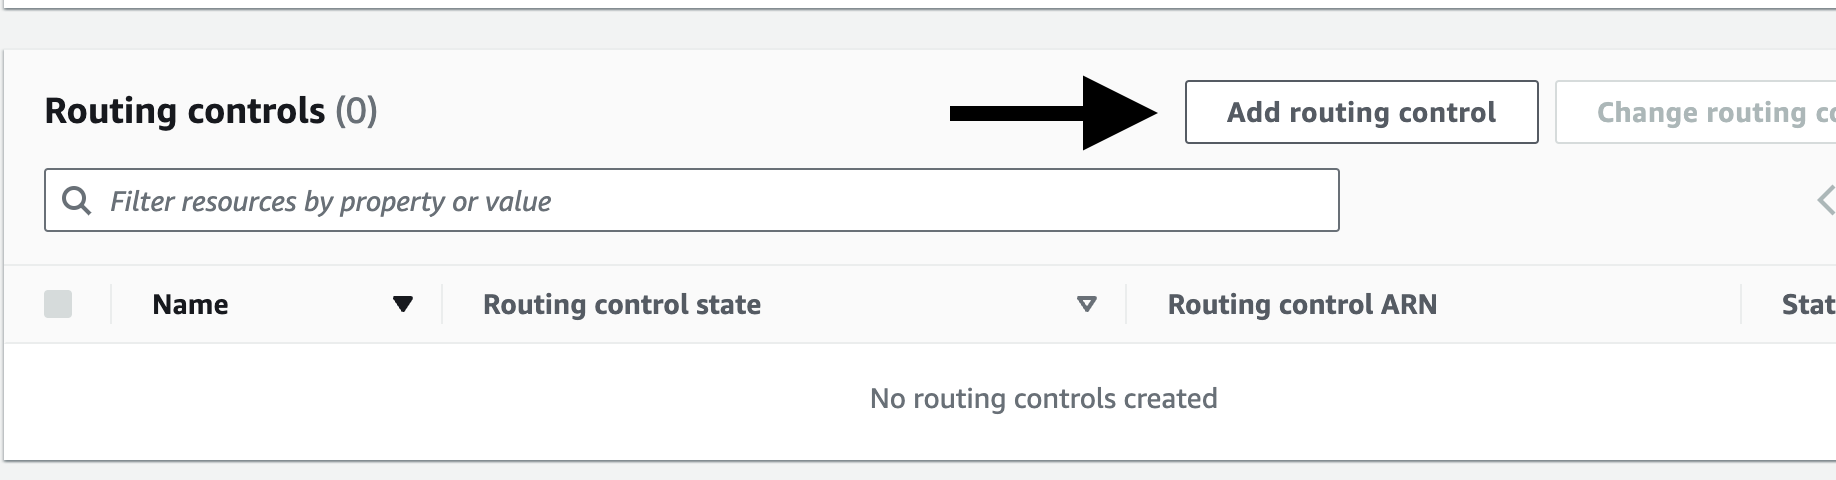
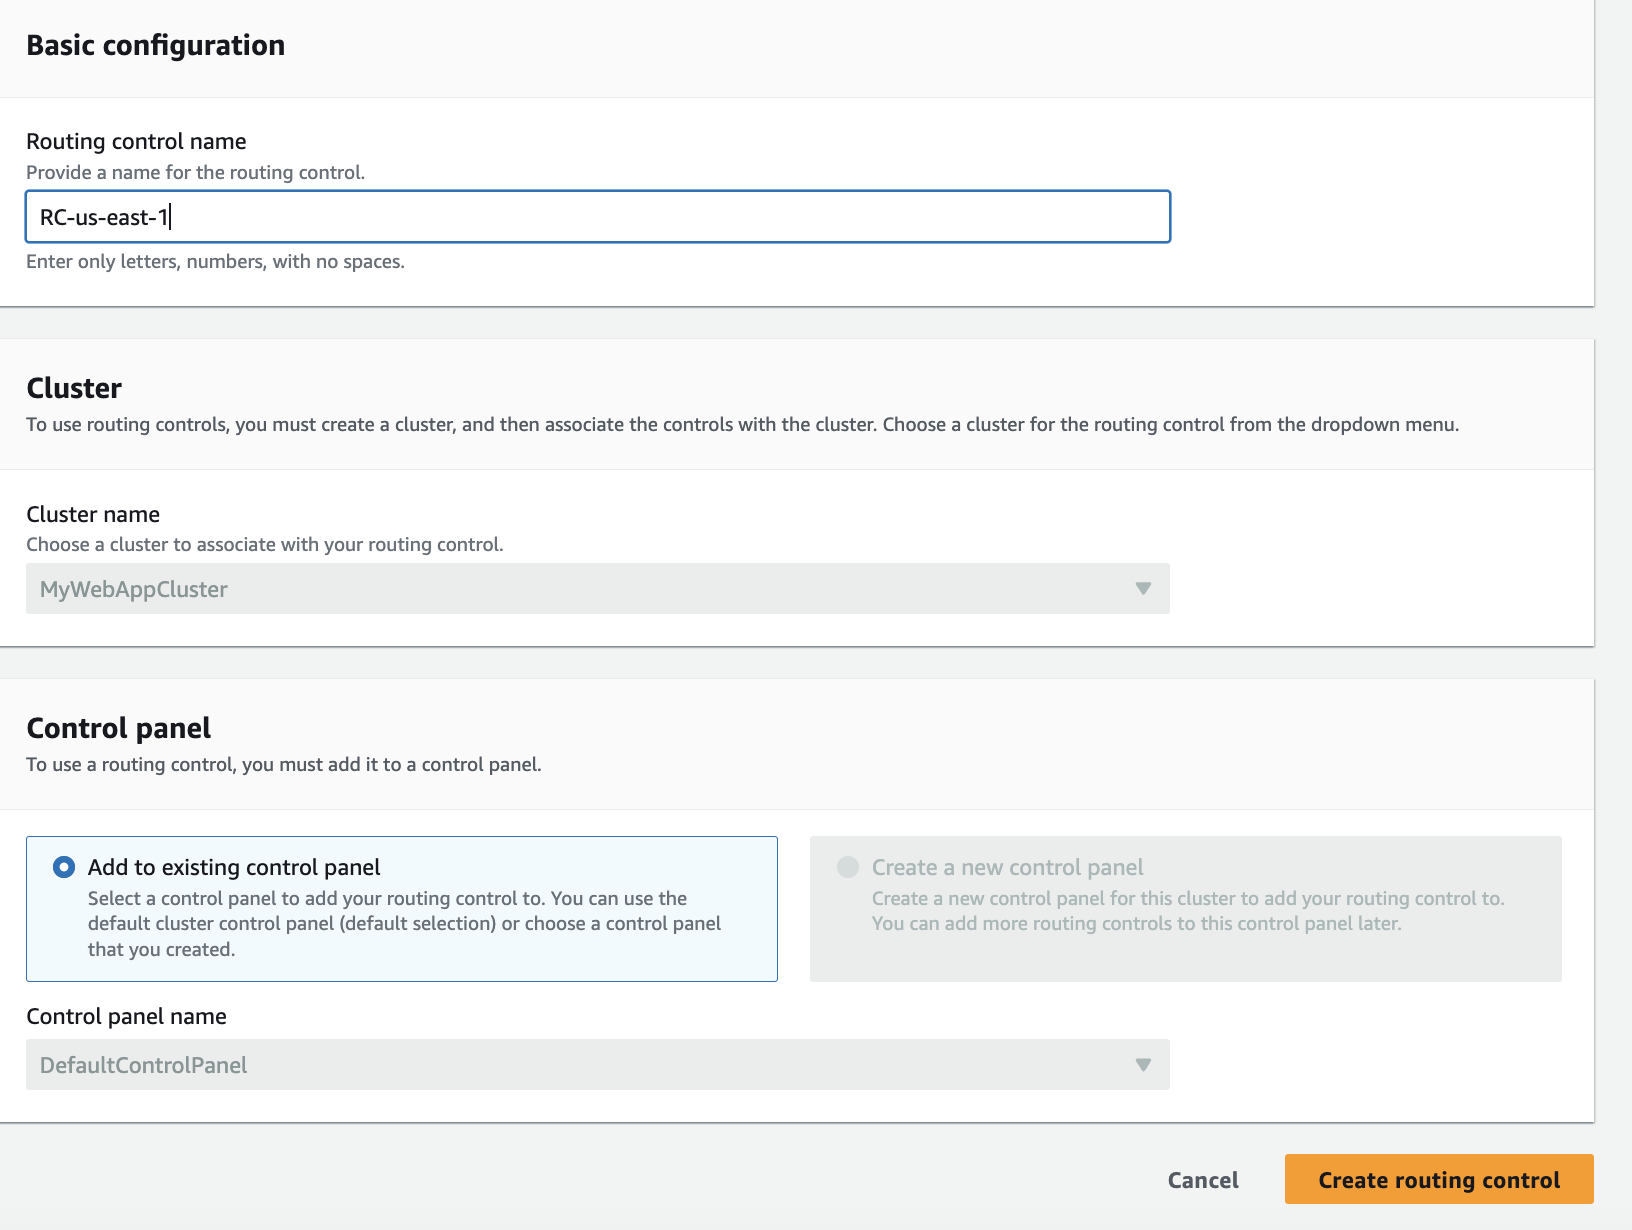
- Now go to Routing Control and navigate to the default Control Panel
- Click on 'Add routing control'
- Now create routing control names for both regions, primary and secondary
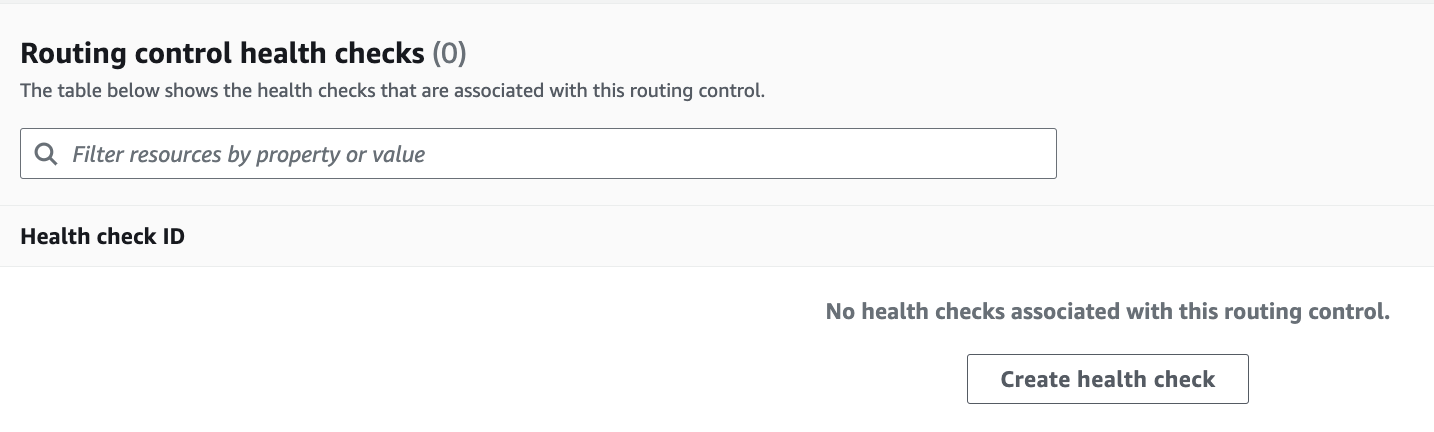
- Let's create the health check for both regions.
- On routing control, click on 'RC-us-east-1' then 'Create health check'
- Provide a health check name, click on 'Create,' and do the same step for both regions.
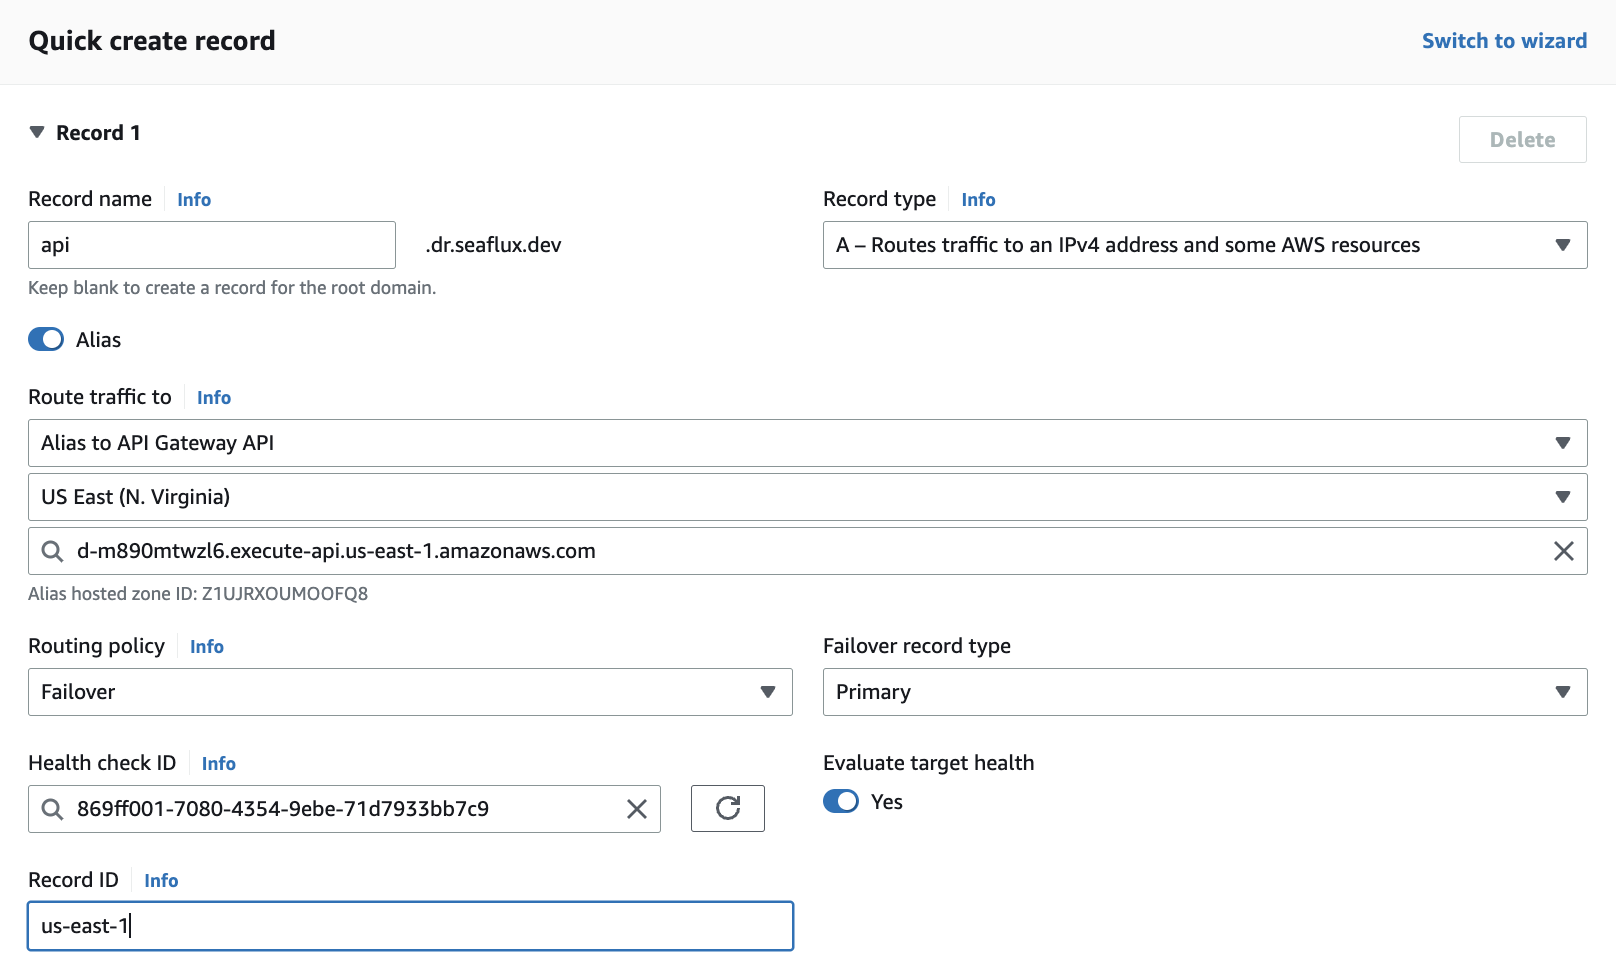
- Now, in the last step, we are going to add records with Route 53.
- Navigate to Route 53, click on 'Hosted zone,' select your domain, and then click on 'Create records'
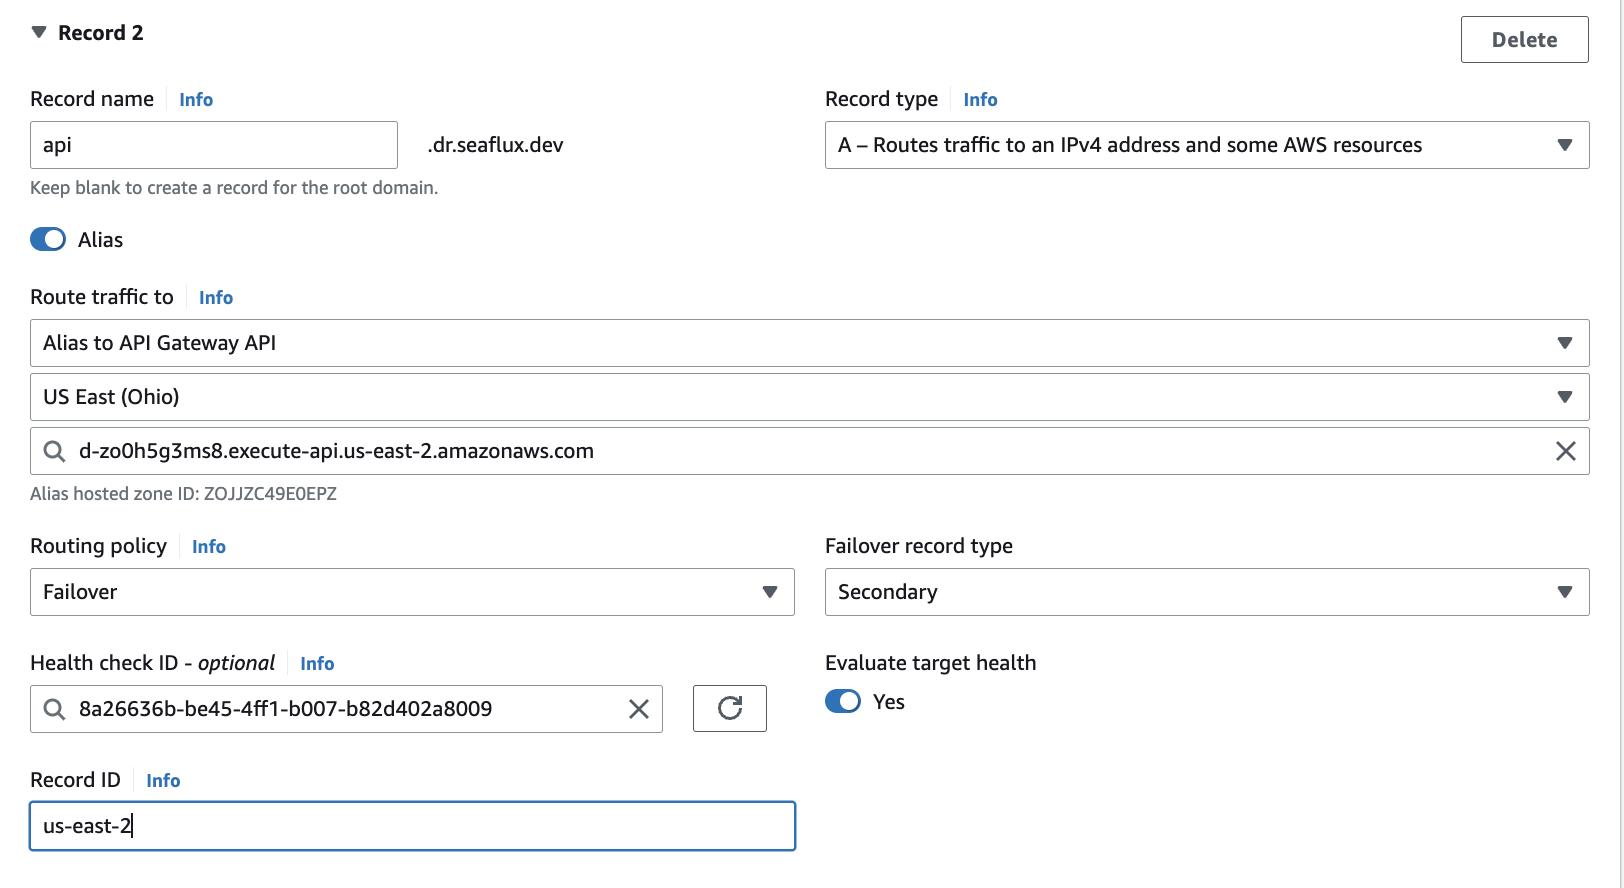
- You can add records as shown in the screenshot for both the primary and secondary regions
- Now, you can browse the API URL in your browser, and it will show you the primary region link, which should be marked as healthy
- When your primary region goes down it will automatically redirect your URL to the secondary region
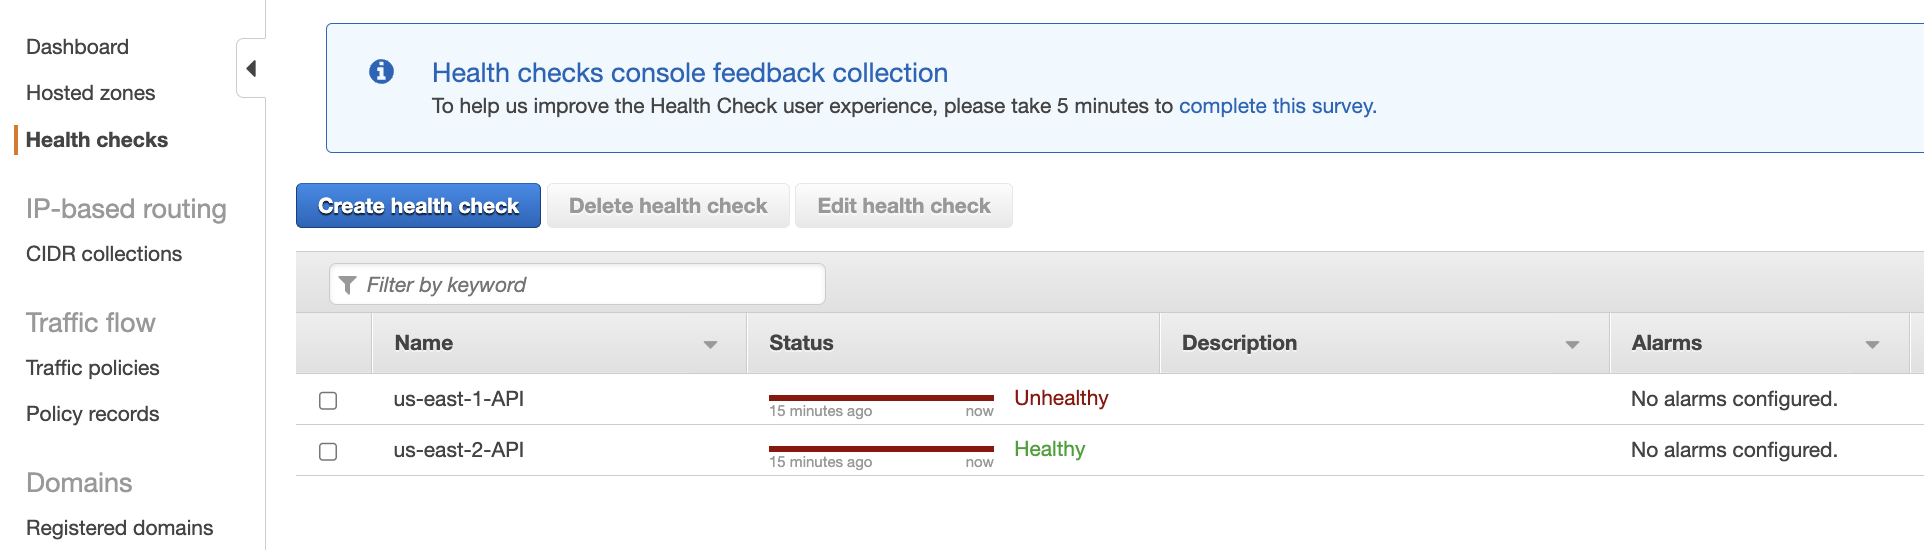
- Also, you can check the health of both regions from the Route 53 health check
End Note
In today's fast-paced and interconnected digital world, the need for a highly available infrastructure has never been greater. We've explored how the Fault tolerance infrastructure can be set up with a step-by-step guide. It brings numerous benefits to the table, from minimizing downtime and enhancing reliability to ensuring business continuity and improving customer satisfaction. A fault tolerance infrastructure is not just a luxury but a necessity for organizations seeking to thrive in the face of disruptions and maintain the trust of their users.
We at Seaflux are your dedicated partners in the ever-evolving landscape of Cloud Computing. Whether you're contemplating a seamless cloud migration, exploring the possibilities of Kubernetes deployment, or harnessing the power of AWS serverless architecture, Seaflux is here to lead the way.
Have specific questions or ambitious projects in mind? Let's discuss! Schedule a meeting with us here, and let Seaflux be your trusted companion in unlocking the potential of cloud innovation. Your journey to a more agile and scalable future starts with us.